Tanzu Application Platform 1.12でTanzu Build ServiceのみをEKS上でインストールするメモ
目次
Tanzu Application Platform 1.12のbuildservice profileを使って、EKS上にTanzu Build Service (TBS)をインストールする手順をメモします。
インストール下準備
まずはインストールに必要なイメージバンドルをダウンロードします。
Broadcom Support Portalにログインします。
Tanzu Application Platformのページに行き、"VMware Tanzu Application Platform"をクリックします。
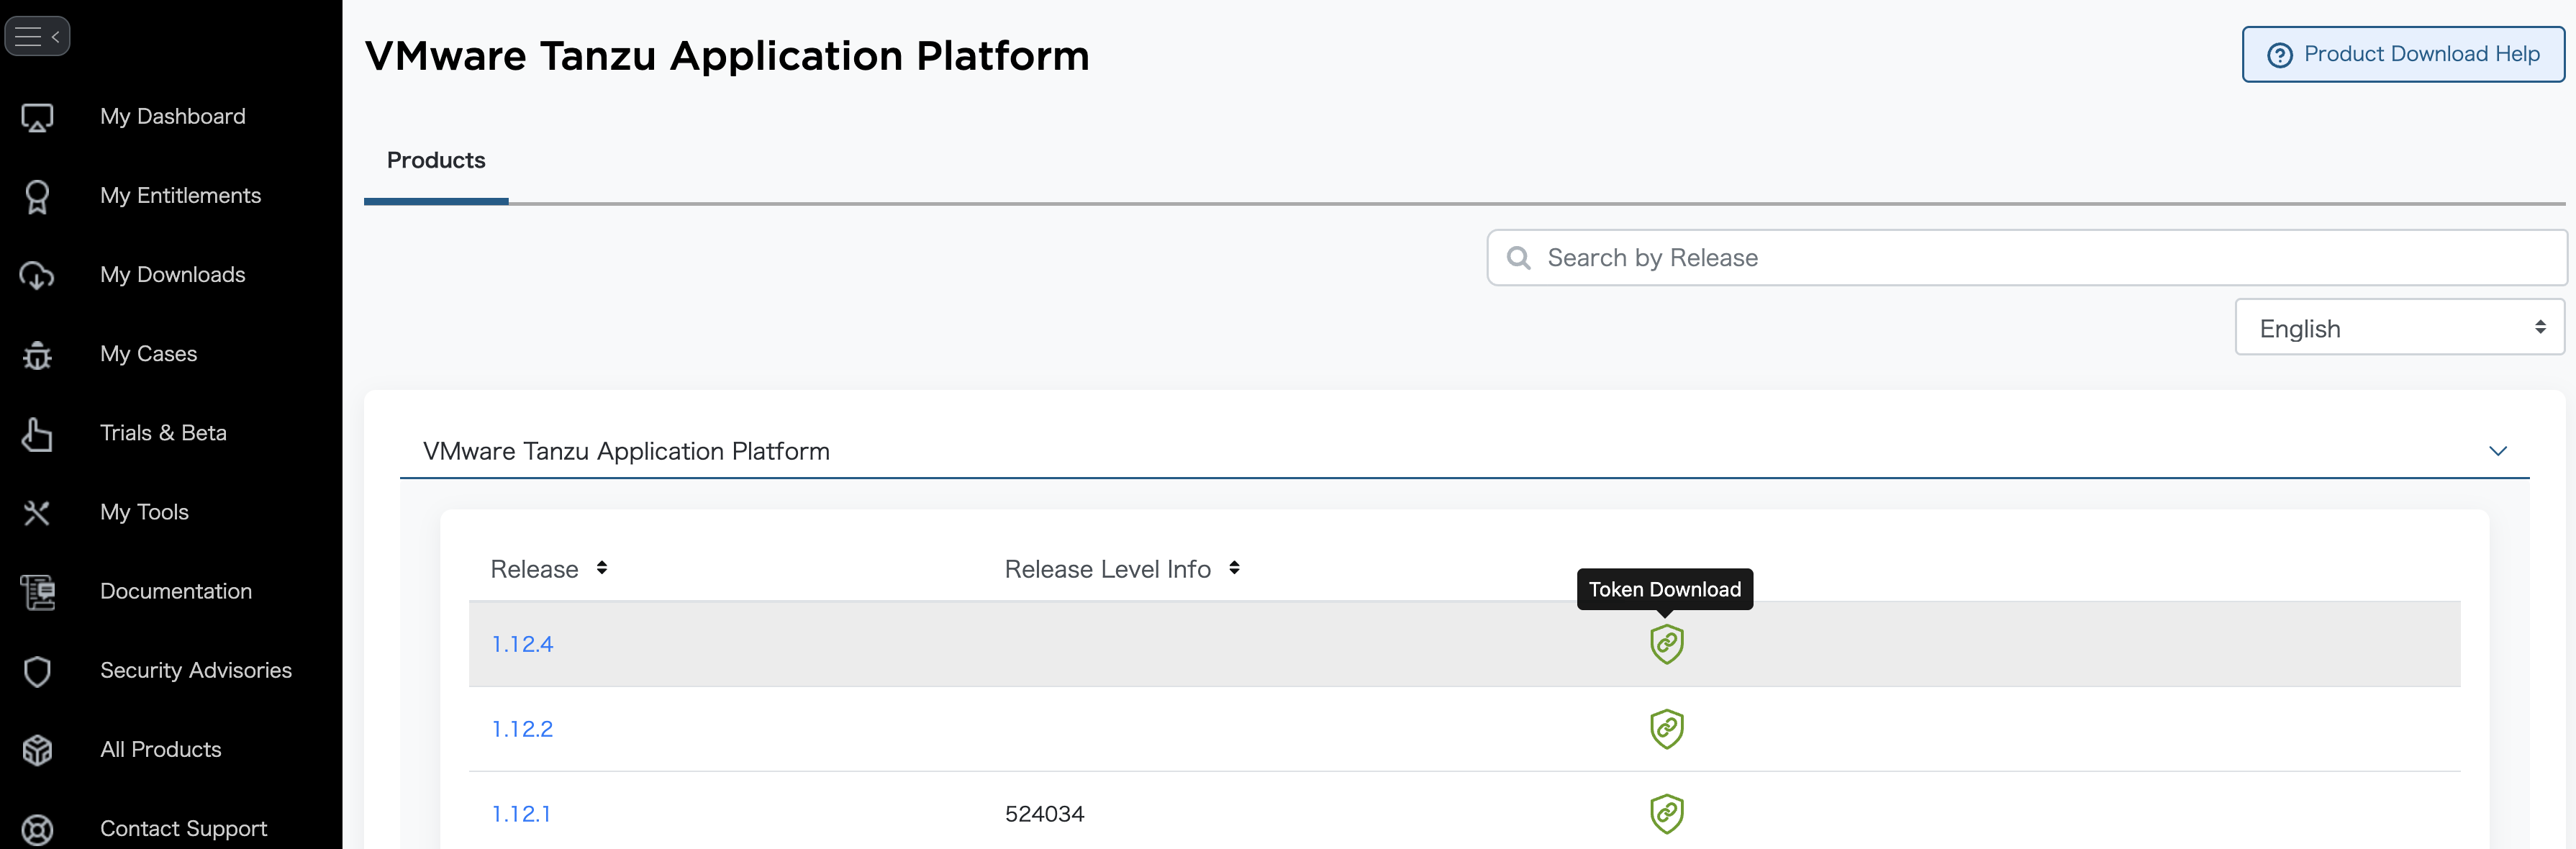
対象のバージョン(今回は1.12.4)の緑のToken Downloadボタンをクリックします。表示されるMY_BROADCOM_SUPPORT_ACCESS_TOKENをコピーして、環境変数に設定します。

export MY_BROADCOM_SUPPORT_ACCESS_TOKEN=eyJ*********************
export MY_BROADCOM_SUPPORT_EMAIL=<Broadcom Support PortalのログインEmailアドレス>
Note
このトークンの有効期限は6ヶ月です。
docker loginを実行して、Tanzu Application Platformのレジストリにログインします。
docker login -u $MY_BROADCOM_SUPPORT_EMAIL -p $MY_BROADCOM_SUPPORT_ACCESS_TOKEN tanzu.packages.broadcom.com
Login Succeededが出力されることを確認してください。
次のコマンドでTAP (TBS)のインストールに利用するイメージバンドルをダウンロードします。
imgpkg copy \
  -b tanzu.packages.broadcom.com/tanzu-application-platform/tap-packages:1.12.4 \
  --to-tar tap-bundle-1.12.4.tar \
  --include-non-distributable-layers

imgpkg copy \
  -b tanzu.packages.broadcom.com/tanzu-application-platform/full-deps-package-repo:1.12.4 \
  --to-tar full-deps-1.12.4.tar \
  --include-non-distributable-layers
ファイルサイズはこのくらいです。
$ ll -h *.tar
-rw-r--r--  1 toshiaki  staff    11G  5 27 11:06 full-deps-1.12.4.tar
-rw-r--r--  1 toshiaki  staff   6.6G  5 27 10:58 tap-bundle-1.12.4.tar
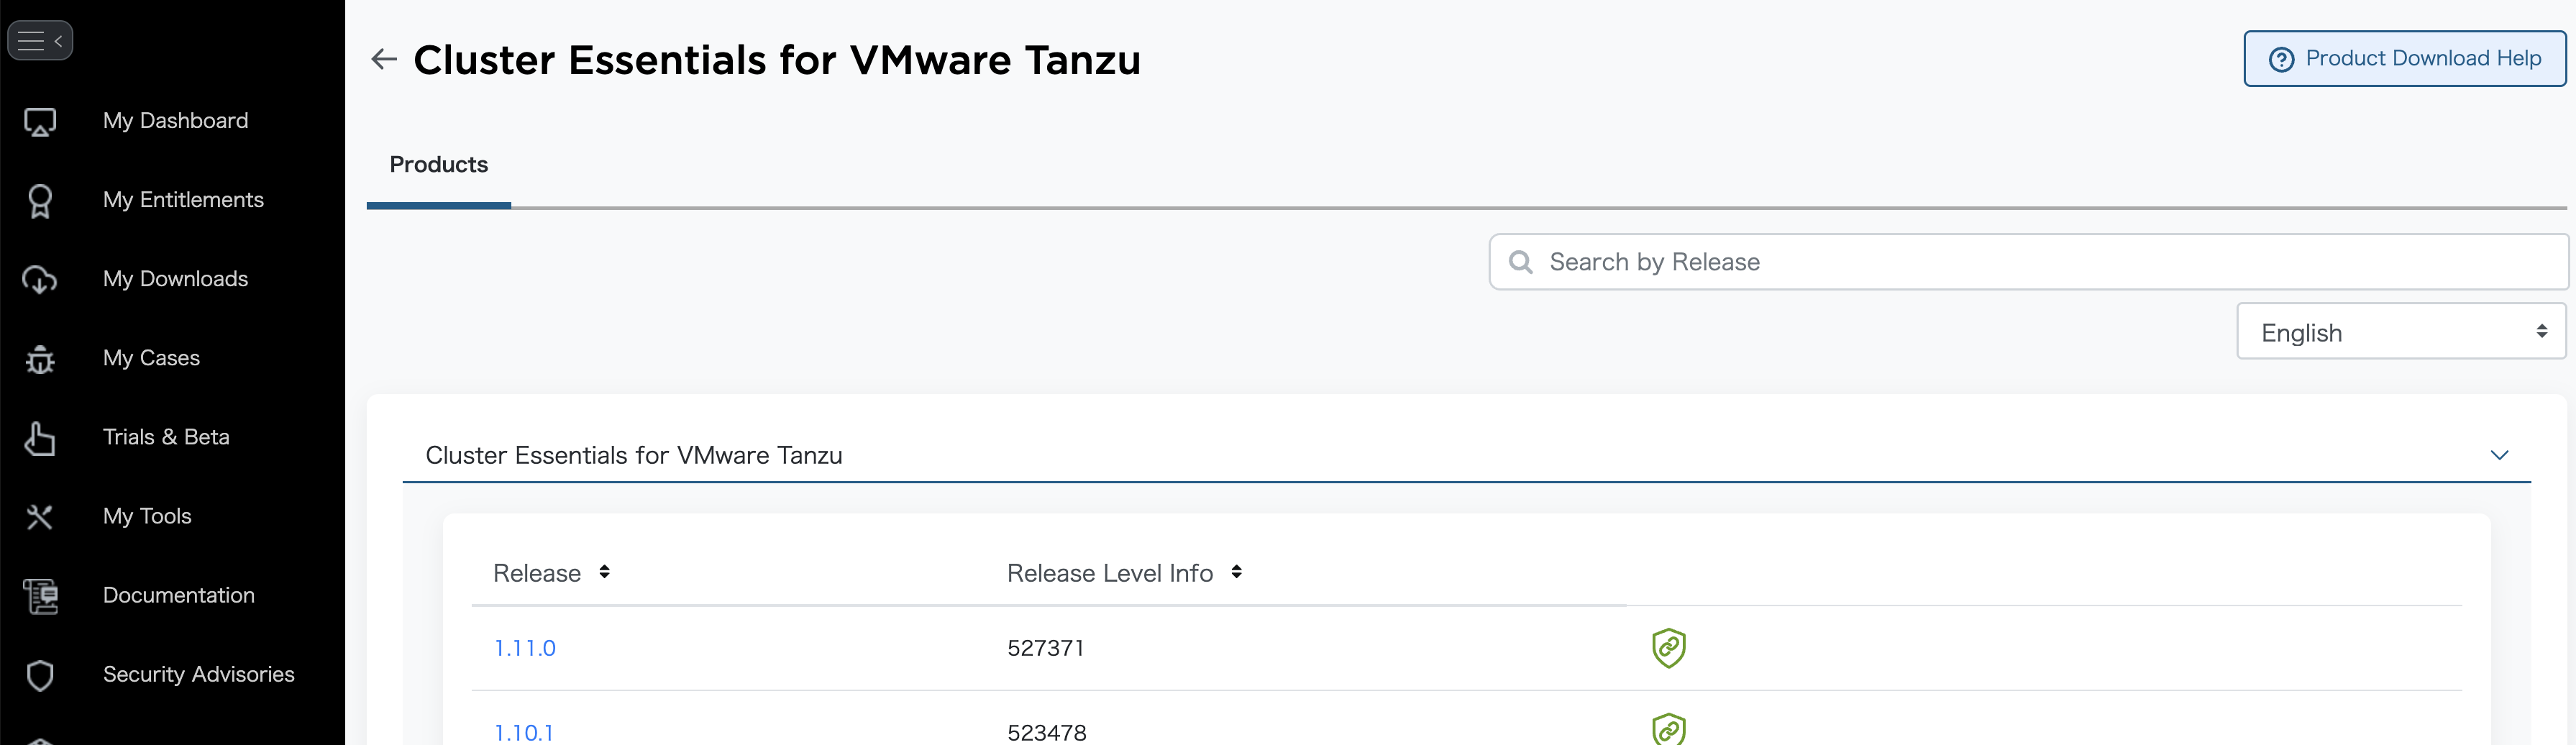
次にCluster Essentials for VMware Tanzuのページに行き、"Cluster Essentials for VMware Tanzu"をクリックします。
対象のバージョン(今回は1.11.0)の緑のToken Downloadボタンをクリックします。

先と同様に、表示されるMY_BROADCOM_SUPPORT_ACCESS_TOKENをコピーして、環境変数に設定します。
export MY_BROADCOM_SUPPORT_ACCESS_TOKEN_CLUSTER_ESSENTIALS=eyJ*********************
export MY_BROADCOM_SUPPORT_EMAIL=<Broadcom Support PortalのログインEmailアドレス>
TAPのトークンと別のトークンであることに気をつけてください。
docker loginを実行して、Cluster Essentials for VMware Tanzuのレジストリにログインします。
docker login -u $MY_BROADCOM_SUPPORT_EMAIL -p $MY_BROADCOM_SUPPORT_ACCESS_TOKEN_CLUSTER_ESSENTIALS cluster-essentials.packages.broadcom.com
Login Succeededが出力されることを確認してください。
次のコマンドでCluster Essentials for VMware Tanzuのインストールに利用するイメージバンドルをダウンロードします。
imgpkg copy \
  -b cluster-essentials.packages.broadcom.com/tanzu-cluster-essentials/cluster-essentials-bundle@sha256:2fd3709f492ac9b437318967a2f557e81686b7a4abe5476c435a5a1486e63a5a \
  --to-tar tanzu-cluster-essentials-1.11.0.tar \
  --include-non-distributable-layers
Note
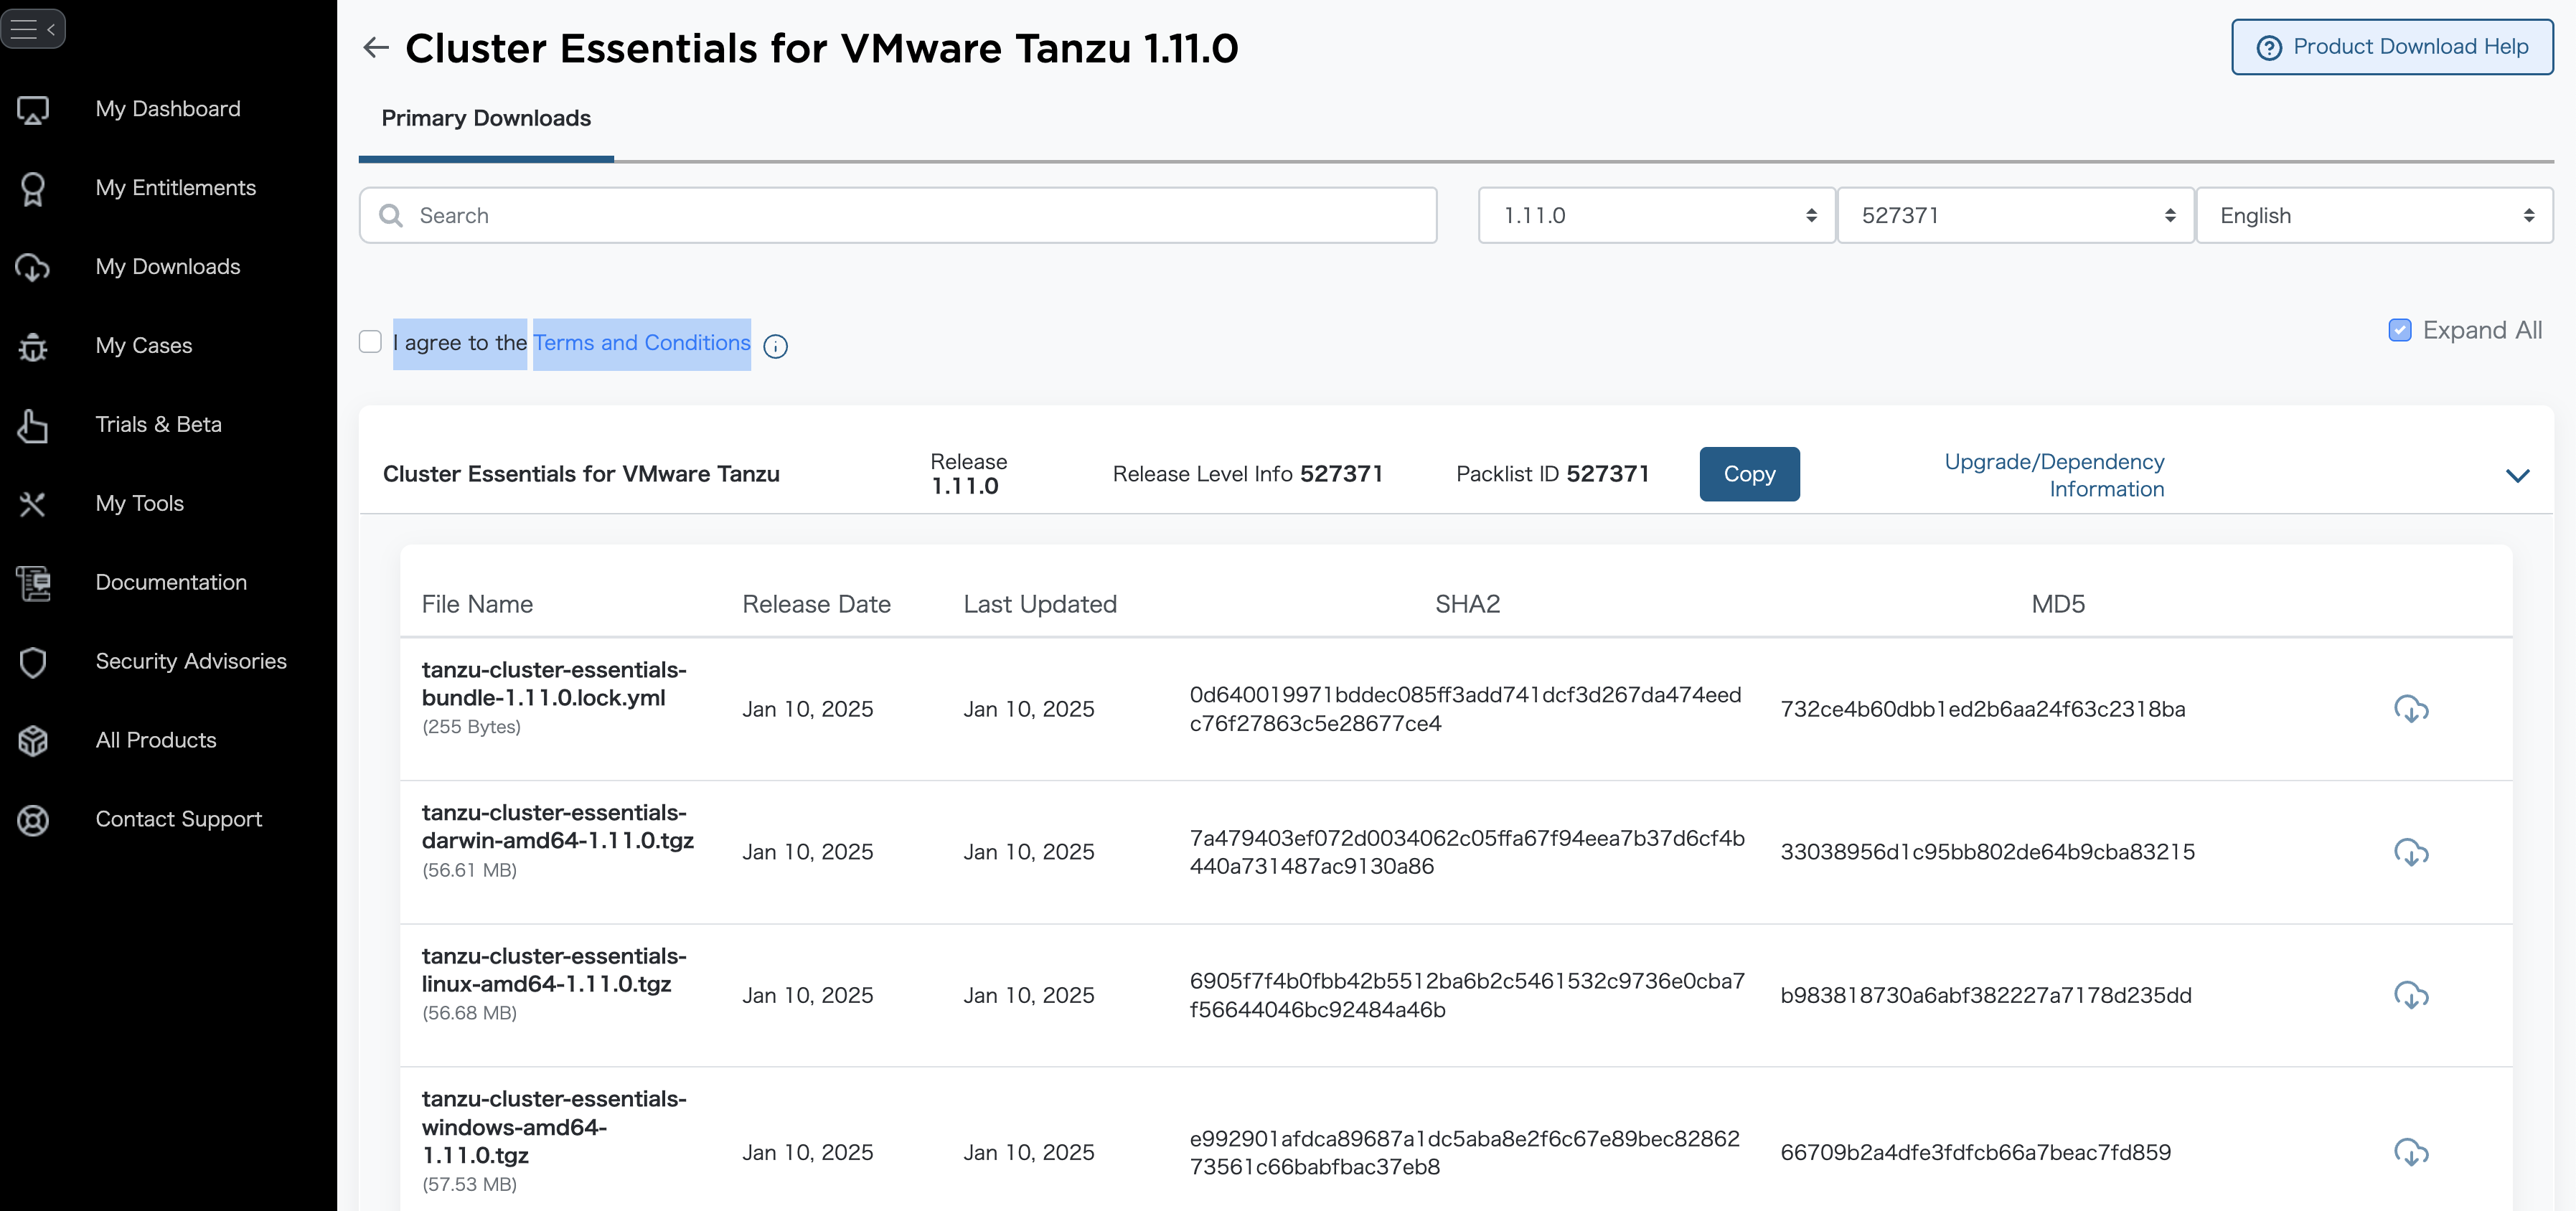
このイメージダイジェスト(2fd3709f492ac9b437318967a2f557e81686b7a4abe5476c435a5a1486e63a5a)は次のダウンロードページのtanzu-cluster-essentials-bundle-1.11.0.lock.ymlに記載されています。
今度は対象のバージョンをクリックします。
"I agree to theTerms and Conditions"にチェックを入れ、インストール作業をするOSのファイルの右側のダウンロードボタンを押します。
VPCとサブネットの作成
まずはEKSクラスターを作成する土台となるVPCとサブネットをTerraformで作成します。ここではシンプルな構成で3つのパブリックサブネットと3つのプライベートサブネットを持つVPCを作成します。プライベートサブネットはNAT Gatewayを通じてインターネットにアクセスできるように設定します。
cat <<'EOF' > tap.tf
provider "aws" {
  region = "ap-northeast-1"
}


variable "project_prefix" {
  description = "Prefix for resource names to indicate the project and environment"
  type        = string
  default     = "tap-sandbox"
}


resource "aws_vpc" "tap_vpc" {
  cidr_block = "10.0.0.0/16"
  tags = {
    Name = "${var.project_prefix}-vpc"
  }
}

resource "aws_internet_gateway" "igw" {
  vpc_id = aws_vpc.tap_vpc.id
}

# Public Subnets
resource "aws_subnet" "public_subnet" {
  count                   = 3
  vpc_id                  = aws_vpc.tap_vpc.id
  cidr_block              = ["10.0.0.0/23", "10.0.2.0/23", "10.0.4.0/23"][count.index]
  availability_zone       = element(["ap-northeast-1a", "ap-northeast-1c", "ap-northeast-1d"], count.index % 3)
  map_public_ip_on_launch = true
  tags = {
    Name = "${var.project_prefix}-public-subnet-${count.index + 1}"
    "kubernetes.io/role/elb" = "1"
  }
}

resource "aws_route_table" "public_rt" {
  vpc_id = aws_vpc.tap_vpc.id
}

resource "aws_route" "public_route" {
  route_table_id         = aws_route_table.public_rt.id
  destination_cidr_block = "0.0.0.0/0"
  gateway_id             = aws_internet_gateway.igw.id
}

resource "aws_route_table_association" "public_rta" {
  count          = 3
  subnet_id      = aws_subnet.public_subnet[count.index].id
  route_table_id = aws_route_table.public_rt.id
}

# Private Subnets
resource "aws_subnet" "private_subnet" {
  count             = 3
  vpc_id            = aws_vpc.tap_vpc.id
  cidr_block        = ["10.0.8.0/22", "10.0.12.0/22", "10.0.16.0/22"][count.index]
  availability_zone = element(["ap-northeast-1a", "ap-northeast-1c", "ap-northeast-1d"], count.index % 3)
  tags = {
    Name = "${var.project_prefix}-private-${element(["tap-1", "tap-2", "tap-3"], count.index)}"
  }
}

# Public NAT Gateway for Private Subnets
resource "aws_eip" "tap_nat_eip" {
  domain = "vpc"
  tags = {
    Name = "${var.project_prefix}-tap-nat-eip"
  }
}

resource "aws_nat_gateway" "tap_nat" {
  allocation_id = aws_eip.tap_nat_eip.id
  subnet_id     = aws_subnet.public_subnet[0].id
  tags = {
    Name = "${var.project_prefix}-tap-nat"
  }
}

# Route tables for tap-1, tap-2, tap-3 subnets to use the Private NAT Gateway
resource "aws_route_table" "private_tap_rt" {
  count  = 3 # For tap-1, tap-2, tap-3
  vpc_id = aws_vpc.tap_vpc.id
  tags = {
    Name = "${var.project_prefix}-private-tap-${count.index}-rt"
  }
}

resource "aws_route" "tap_private_route" {
  count                  = 3 # For tap-1, tap-2, tap-3
  route_table_id         = element(aws_route_table.private_tap_rt.*.id, count.index)
  destination_cidr_block = "0.0.0.0/0"
  nat_gateway_id         = aws_nat_gateway.tap_nat.id
}

resource "aws_route_table_association" "tap_rta" {
  count          = 3 # For tap-1, tap-2, tap-3
  subnet_id      = element(aws_subnet.private_subnet.*.id, count.index) # Adjust indices for tap-1, tap-2, tap-3
  route_table_id = element(aws_route_table.private_tap_rt.*.id, count.index)
}
EOF
次のコマンドでTerraformを実行して、VPCとサブネットを作成します。
terraform init
terraform plan -out plan
terraform apply plan
作成されたVPCやサブネットの情報を次のコマンドで環境変数に設定します。これにより、後続のステップでこれらの情報を簡単に参照できるようになります。
cat <<EOF > ./vars.sh
export VPC_ID=$(cat terraform.tfstate | jq -r '.resources[] | select(.name == "tap_vpc").instances[0].attributes.id')
export PUBLIC_SUBNET_1_ID=$(cat terraform.tfstate | jq -r '.resources[] | select(.name == "public_subnet").instances[0].attributes.id')
export PUBLIC_SUBNET_1_AZ=$(cat terraform.tfstate | jq -r '.resources[] | select(.name == "public_subnet").instances[0].attributes.availability_zone')
export PUBLIC_SUBNET_2_ID=$(cat terraform.tfstate | jq -r '.resources[] | select(.name == "public_subnet").instances[1].attributes.id')
export PUBLIC_SUBNET_2_AZ=$(cat terraform.tfstate | jq -r '.resources[] | select(.name == "public_subnet").instances[1].attributes.availability_zone')
export PUBLIC_SUBNET_3_ID=$(cat terraform.tfstate | jq -r '.resources[] | select(.name == "public_subnet").instances[2].attributes.id')
export PUBLIC_SUBNET_3_AZ=$(cat terraform.tfstate | jq -r '.resources[] | select(.name == "public_subnet").instances[2].attributes.availability_zone')
export PRIVATE_SUBNET_1_ID=$(cat terraform.tfstate | jq -r '.resources[] | select(.name == "private_subnet").instances[0].attributes.id')
export PRIVATE_SUBNET_1_AZ=$(cat terraform.tfstate | jq -r '.resources[] | select(.name == "private_subnet").instances[0].attributes.availability_zone')
export PRIVATE_SUBNET_2_ID=$(cat terraform.tfstate | jq -r '.resources[] | select(.name == "private_subnet").instances[1].attributes.id')
export PRIVATE_SUBNET_2_AZ=$(cat terraform.tfstate | jq -r '.resources[] | select(.name == "private_subnet").instances[1].attributes.availability_zone')
export PRIVATE_SUBNET_3_ID=$(cat terraform.tfstate | jq -r '.resources[] | select(.name == "private_subnet").instances[2].attributes.id')
export PRIVATE_SUBNET_3_AZ=$(cat terraform.tfstate | jq -r '.resources[] | select(.name == "private_subnet").instances[2].attributes.availability_zone')
EOF

source vars.sh
EKSクラスターの作成
作成したVPCとサブネットを使って、EKSクラスターを作成します。ここでは、eksctlを使用してクラスターを作成します。
cat <<EOF > eks-cluster-config.yaml
---
kind: ClusterConfig
apiVersion: eksctl.io/v1alpha5
metadata:
  name: tap-sandbox
  region: ap-northeast-1
  version: "1.32"
managedNodeGroups:
- name: tap-sandbox-ng-1
  minSize: 1
  maxSize: 3
  desiredCapacity: 1
  volumeSize: 200
  maxPodsPerNode: 110
  instanceType: c5.xlarge
  privateNetworking: true
  spot: true
addons:
- name: aws-ebs-csi-driver
  wellKnownPolicies:
    ebsCSIController: true
iam:
  withOIDC: true
vpc:
  id: ${VPC_ID}
  subnets:
    private:
      ${PRIVATE_SUBNET_1_AZ}:
        id: ${PRIVATE_SUBNET_1_ID}
      ${PRIVATE_SUBNET_2_AZ}:
        id: ${PRIVATE_SUBNET_2_ID}
      ${PRIVATE_SUBNET_3_AZ}:
        id: ${PRIVATE_SUBNET_3_ID}
---
EOF
次のコマンドでEKSクラスターを作成します。
eksctl create cluster -f eks-cluster-config.yaml
クラスターの作成が完了したら、次のコマンドでクラスターの状態を確認します。
$ kubectl get node -owide
NAME                                            STATUS   ROLES    AGE     VERSION               INTERNAL-IP   EXTERNAL-IP   OS-IMAGE                       KERNEL-VERSION                    CONTAINER-RUNTIME
ip-10-0-15-10.ap-northeast-1.compute.internal   Ready    <none>   8m28s   v1.32.3-eks-473151a   10.0.15.10    <none>        Amazon Linux 2023.7.20250512   6.1.134-152.225.amzn2023.x86_64   containerd://1.7.27

$ kubectl get nodes -o=custom-columns='NAME:.metadata.name,INSTANCE-TYPE:.metadata.labels.beta\.kubernetes\.io/instance-type,CAPACITY-TYPE:.metadata.labels.eks\.amazonaws\.com/capacityType,ZONE:.metadata.labels.failure-domain\.beta\.kubernetes\.io/zone'
NAME                                            INSTANCE-TYPE   CAPACITY-TYPE   ZONE
ip-10-0-15-10.ap-northeast-1.compute.internal   c5.xlarge       SPOT            ap-northeast-1c
ECRレポジトリの作成
次に、TAP(TBS)のイメージを保存するためのECRレポジトリを作成します。以下のコマンドを実行して、必要なECRレポジトリを作成します。
export AWS_ACCOUNT_ID=$(aws sts get-caller-identity --query Account --output text)
export AWS_REGION=ap-northeast-1
export EKS_CLUSTER_NAME=tap-sandbox
インストールに必要な以下のECRレポジトリを作成します。
aws ecr create-repository --repository-name tap-images --region $AWS_REGION
aws ecr create-repository --repository-name tap-build-service --region $AWS_REGION
aws ecr create-repository --repository-name full-deps-package-repo --region $AWS_REGION
aws ecr create-repository --repository-name tanzu-cluster-essentials --region $AWS_REGION
IAMロールとポリシーの作成
次に、TAP(TBS)がECRにIRSAでアクセスできるようにするためのIAMロールとポリシーを作成します。以下のコマンドを実行して、必要なIAMロールとポリシーを作成します。
# Retrieve the OIDC endpoint from the Kubernetes cluster and store it for use in the policy.
export OIDCPROVIDER=$(aws eks describe-cluster --name $EKS_CLUSTER_NAME --region $AWS_REGION --output json | jq '.cluster.identity.oidc.issuer' | tr -d '"' | sed 's/https:\/\///')

cat << EOF > build-service-trust-policy.json
{
    "Version": "2012-10-17",
    "Statement": [
        {
            "Effect": "Allow",
            "Principal": {
                "Federated": "arn:aws:iam::${AWS_ACCOUNT_ID}:oidc-provider/${OIDCPROVIDER}"
            },
            "Action": "sts:AssumeRoleWithWebIdentity",
            "Condition": {
                "StringEquals": {
                    "${OIDCPROVIDER}:aud": "sts.amazonaws.com"
                },
                "StringLike": {
                    "${OIDCPROVIDER}:sub": [
                        "system:serviceaccount:kpack:controller",
                        "system:serviceaccount:build-service:dependency-updater-controller-serviceaccount"
                    ]
                }
            }
        }
    ]
}
EOF

cat << EOF > build-service-policy.json
{
    "Version": "2012-10-17",
    "Statement": [
        {
            "Action": [
                "ecr:DescribeRegistry",
                "ecr:GetAuthorizationToken",
                "ecr:GetRegistryPolicy",
                "ecr:PutRegistryPolicy",
                "ecr:PutReplicationConfiguration",
                "ecr:DeleteRegistryPolicy"
            ],
            "Resource": "*",
            "Effect": "Allow",
            "Sid": "TAPEcrBuildServiceGlobal"
        },
        {
            "Action": [
                "ecr:DescribeImages",
                "ecr:ListImages",
                "ecr:BatchCheckLayerAvailability",
                "ecr:BatchGetImage",
                "ecr:BatchGetRepositoryScanningConfiguration",
                "ecr:DescribeImageReplicationStatus",
                "ecr:DescribeImageScanFindings",
                "ecr:DescribeRepositories",
                "ecr:GetDownloadUrlForLayer",
                "ecr:GetLifecyclePolicy",
                "ecr:GetLifecyclePolicyPreview",
                "ecr:GetRegistryScanningConfiguration",
                "ecr:GetRepositoryPolicy",
                "ecr:ListTagsForResource",
                "ecr:TagResource",
                "ecr:UntagResource",
                "ecr:BatchDeleteImage",
                "ecr:BatchImportUpstreamImage",
                "ecr:CompleteLayerUpload",
                "ecr:CreatePullThroughCacheRule",
                "ecr:CreateRepository",
                "ecr:DeleteLifecyclePolicy",
                "ecr:DeletePullThroughCacheRule",
                "ecr:DeleteRepository",
                "ecr:InitiateLayerUpload",
                "ecr:PutImage",
                "ecr:PutImageScanningConfiguration",
                "ecr:PutImageTagMutability",
                "ecr:PutLifecyclePolicy",
                "ecr:PutRegistryScanningConfiguration",
                "ecr:ReplicateImage",
                "ecr:StartImageScan",
                "ecr:StartLifecyclePolicyPreview",
                "ecr:UploadLayerPart",
                "ecr:DeleteRepositoryPolicy",
                "ecr:SetRepositoryPolicy"
            ],
            "Resource": [
                "arn:aws:ecr:${AWS_REGION}:${AWS_ACCOUNT_ID}:repository/full-deps-package-repo",
                "arn:aws:ecr:${AWS_REGION}:${AWS_ACCOUNT_ID}:repository/tap-build-service",
                "arn:aws:ecr:${AWS_REGION}:${AWS_ACCOUNT_ID}:repository/tap-images"
            ],
            "Effect": "Allow",
            "Sid": "TAPEcrBuildServiceScoped"
        }
    ]
}
EOF

cat << EOF > workload-policy.json
{
    "Version": "2012-10-17",
    "Statement": [
        {
            "Action": [
                "ecr:DescribeRegistry",
                "ecr:GetAuthorizationToken",
                "ecr:GetRegistryPolicy",
                "ecr:PutRegistryPolicy",
                "ecr:PutReplicationConfiguration",
                "ecr:DeleteRegistryPolicy"
            ],
            "Resource": "*",
            "Effect": "Allow",
            "Sid": "TAPEcrWorkloadGlobal"
        },
        {
            "Action": [
                "ecr:DescribeImages",
                "ecr:ListImages",
                "ecr:BatchCheckLayerAvailability",
                "ecr:BatchGetImage",
                "ecr:BatchGetRepositoryScanningConfiguration",
                "ecr:DescribeImageReplicationStatus",
                "ecr:DescribeImageScanFindings",
                "ecr:DescribeRepositories",
                "ecr:GetDownloadUrlForLayer",
                "ecr:GetLifecyclePolicy",
                "ecr:GetLifecyclePolicyPreview",
                "ecr:GetRegistryScanningConfiguration",
                "ecr:GetRepositoryPolicy",
                "ecr:ListTagsForResource",
                "ecr:TagResource",
                "ecr:UntagResource",
                "ecr:BatchDeleteImage",
                "ecr:BatchImportUpstreamImage",
                "ecr:CompleteLayerUpload",
                "ecr:CreatePullThroughCacheRule",
                "ecr:CreateRepository",
                "ecr:DeleteLifecyclePolicy",
                "ecr:DeletePullThroughCacheRule",
                "ecr:DeleteRepository",
                "ecr:InitiateLayerUpload",
                "ecr:PutImage",
                "ecr:PutImageScanningConfiguration",
                "ecr:PutImageTagMutability",
                "ecr:PutLifecyclePolicy",
                "ecr:PutRegistryScanningConfiguration",
                "ecr:ReplicateImage",
                "ecr:StartImageScan",
                "ecr:StartLifecyclePolicyPreview",
                "ecr:UploadLayerPart",
                "ecr:DeleteRepositoryPolicy",
                "ecr:SetRepositoryPolicy"
            ],
            "Resource": [
                "arn:aws:ecr:${AWS_REGION}:${AWS_ACCOUNT_ID}:repository/full-deps-package-repo",
                "arn:aws:ecr:${AWS_REGION}:${AWS_ACCOUNT_ID}:repository/tap-build-service",
                "arn:aws:ecr:${AWS_REGION}:${AWS_ACCOUNT_ID}:repository/tanzu-application-platform/*"
            ],
            "Effect": "Allow",
            "Sid": "TAPEcrWorkloadScoped"
        }
    ]
}
EOF

cat << EOF > workload-trust-policy.json
{
    "Version": "2012-10-17",
    "Statement": [
        {
            "Effect": "Allow",
            "Principal": {
                "Federated": "arn:aws:iam::${AWS_ACCOUNT_ID}:oidc-provider/${OIDCPROVIDER}"
            },
            "Action": "sts:AssumeRoleWithWebIdentity",
            "Condition": {
                "StringLike": {
                    "${OIDCPROVIDER}:sub": "system:serviceaccount:*:default",
                    "${OIDCPROVIDER}:aud": "sts.amazonaws.com"
                }
            }
        }
    ]
}
EOF

aws iam create-role --role-name tap-build-service-${EKS_CLUSTER_NAME} --assume-role-policy-document file://build-service-trust-policy.json
aws iam put-role-policy --role-name tap-build-service-${EKS_CLUSTER_NAME} --policy-name tapBuildServicePolicy-${EKS_CLUSTER_NAME} --policy-document file://build-service-policy.json

aws iam create-role --role-name tap-workload-${EKS_CLUSTER_NAME} --assume-role-policy-document file://workload-trust-policy.json
aws iam put-role-policy --role-name tap-workload-${EKS_CLUSTER_NAME} --policy-name tapWorkload-${EKS_CLUSTER_NAME} --policy-document file://workload-policy.json
Cluster Essentialsのインストール
先にダウンロード済みのCluster EssentialsのイメージバンドルをECRにリロケートします。
ECR_REPO=$(aws ecr describe-repositories --region ${AWS_REGION} --query 'repositories[?repositoryName==`tanzu-cluster-essentials`].repositoryUri' --output text)
aws ecr get-login-password --region ${AWS_REGION} | docker login ${ECR_REPO} -u AWS --password-stdin

imgpkg copy \
  --tar tanzu-cluster-essentials-1.11.0.tar \
  --to-repo ${ECR_REPO} \
  --include-non-distributable-layers
次に、ダウンロードしたCluster Essentialsのファイルを次のコマンドで展開します。
tar xzvf tanzu-cluster-essentials-*-1.11.0.tgz
そして、Cluster Essentialsのインストールを行います。INSTALL_REGISTRY_HOSTNAME、INSTALL_REGISTRY_USERNAME、INSTALL_REGISTRY_PASSWORDにはダミー値を入れてください。
mkdir -p tanzu-cluster-essentials
tar -xvf tanzu-cluster-essentials-*-1.11.0.tgz -C tanzu-cluster-essentials
cd tanzu-cluster-essentials

INSTALL_BUNDLE=${ECR_REPO}@sha256:2fd3709f492ac9b437318967a2f557e81686b7a4abe5476c435a5a1486e63a5a \
INSTALL_REGISTRY_HOSTNAME=dummy.example.com \
INSTALL_REGISTRY_USERNAME=dummy \
INSTALL_REGISTRY_PASSWORD=dummy \
./install.sh --yes
cd ..
インストールが完了したら、次のコマンドでPodの状態を確認します。kapp-controllerやsecretgen-controllerなどのPodが正常に起動していることを確認してください。
$ kubectl get pod -A
NAMESPACE              NAME                                    READY   STATUS    RESTARTS   AGE
kapp-controller        kapp-controller-66d8f9f98-bn9fr         2/2     Running   0          23s
kube-system            aws-node-bzp8h                          2/2     Running   0          21m
kube-system            coredns-6d78c58c9f-mx66d                1/1     Running   0          23m
kube-system            coredns-6d78c58c9f-xdx68                1/1     Running   0          23m
kube-system            ebs-csi-controller-9bbd9f44d-d9ql7      6/6     Running   0          17m
kube-system            ebs-csi-controller-9bbd9f44d-h2v89      6/6     Running   0          17m
kube-system            ebs-csi-node-l2gcl                      3/3     Running   0          17m
kube-system            kube-proxy-ccwrj                        1/1     Running   0          21m
kube-system            metrics-server-6c8c76d545-wsw79         1/1     Running   0          24m
kube-system            metrics-server-6c8c76d545-x2854         1/1     Running   0          24m
secretgen-controller   secretgen-controller-7df8ddbb7d-7ttw5   1/1     Running   0          13s
TAP(TBS)のインストール
次に、TAP(TBS)のインストールを行います。先にダウンロード済みのTAPのイメージバンドルをECRにリロケートします。
ECR_REPO=$(aws ecr describe-repositories --region ${AWS_REGION} --query 'repositories[?repositoryName==`tap-images`].repositoryUri' --output text)
aws ecr get-login-password --region ${AWS_REGION} | docker login ${ECR_REPO} -u AWS --password-stdin

imgpkg copy \
  --concurrency 16 \
  --tar tap-bundle-1.12.4.tar \
  --to-repo ${ECR_REPO} \
  --include-non-distributable-layers
また、先にダウンロード済みのTBSのfull-depsパッケージをECRにリロケートします。
ECR_REPO=$(aws ecr describe-repositories --region ${AWS_REGION} --query 'repositories[?repositoryName==`full-deps-package-repo`].repositoryUri' --output text)
aws ecr get-login-password --region ${AWS_REGION} | docker login ${ECR_REPO} -u AWS --password-stdin

imgpkg copy \
  --concurrency 16 \
  --tar full-deps-1.12.4.tar \
  --to-repo ${ECR_REPO} \
  --include-non-distributable-layers
TAP(TBS)をインストールするためのnamespaceを作成します。
kubectl create ns tap-install
TAPのレポジトリを登録します。
ECR_REPO=$(aws ecr describe-repositories --region ${AWS_REGION} --query 'repositories[?repositoryName==`tap-images`].repositoryUri' --output text)
aws ecr get-login-password --region ${AWS_REGION} | docker login ${ECR_REPO} -u AWS --password-stdin

tanzu package repository add tanzu-tap-repository \
  --url ${ECR_REPO}:1.12.4 \
  --namespace tap-install
次のコマンドでTAPのレポジトリが正常に登録されていることを確認します。
$ tanzu package repository get tanzu-tap-repository --namespace tap-install

NAMESPACE:               tap-install
NAME:                    tanzu-tap-repository
SOURCE:                  (imgpkg) 798085859000.dkr.ecr.ap-northeast-1.amazonaws.com/tap-images:1.12.4
STATUS:                  Reconcile succeeded
CONDITIONS:              - status: "True"
  type: ReconcileSucceeded
USEFUL-ERROR-MESSAGE:
TAP (TBS)をインストールするための設定ファイルであるtap-values.yamlを作成します。
cat <<EOF > tap-values.yaml
---
ceip_policy_disclosed: true
profile: buildservice
buildservice:
  kp_default_repository: ${AWS_ACCOUNT_ID}.dkr.ecr.${AWS_REGION}.amazonaws.com/tap-build-service
  kp_default_repository_aws_iam_role_arn: arn:aws:iam::${AWS_ACCOUNT_ID}:role/tap-build-service-${EKS_CLUSTER_NAME}
  exclude_dependencies: true
  dependency_updates:
    allow: true
    scope: all
---
EOF
次に、TAP (TBS)をインストールします。以下のコマンドを実行して、TAP (TBS)をインストールします。
tanzu package install tap -p tap.tanzu.vmware.com -v 1.12.4 --values-file tap-values.yaml -n tap-install
インストールが完了したら、次のコマンドでTAP (TBS)のインストール状況を確認します。
$ tanzu package installed list -n tap-install

  NAME          PACKAGE-NAME                   PACKAGE-VERSION  STATUS
  buildservice  buildservice.tanzu.vmware.com  1.15.14          Reconcile succeeded
  tap           tap.tanzu.vmware.com           1.12.4           Reconcile succeeded
次のコマンドでTAP (TBS)のPodの状態を確認します。
$ kubectl get pod -A
NAMESPACE                NAME                                        READY   STATUS    RESTARTS   AGE
build-service            build-pod-image-fetcher-hvmh4               5/5     Running   0          75s
build-service            secret-syncer-controller-84b949bb44-rmsmb   1/1     Running   0          75s
build-service            warmer-controller-947467db5-ddwc7           1/1     Running   0          75s
cert-injection-webhook   cert-injection-webhook-79f6757578-4q59h     1/1     Running   0          75s
kapp-controller          kapp-controller-66d8f9f98-bn9fr             2/2     Running   0          21m
kpack                    kpack-controller-6c7f9ff545-tf276           1/1     Running   0          75s
kpack                    kpack-webhook-7b457bfdcc-tv8dd              1/1     Running   0          75s
kube-system              aws-node-bzp8h                              2/2     Running   0          42m
kube-system              coredns-6d78c58c9f-mx66d                    1/1     Running   0          45m
kube-system              coredns-6d78c58c9f-xdx68                    1/1     Running   0          45m
kube-system              ebs-csi-controller-9bbd9f44d-d9ql7          6/6     Running   0          39m
kube-system              ebs-csi-controller-9bbd9f44d-h2v89          6/6     Running   0          39m
kube-system              ebs-csi-node-l2gcl                          3/3     Running   0          39m
kube-system              kube-proxy-ccwrj                            1/1     Running   0          42m
kube-system              metrics-server-6c8c76d545-wsw79             1/1     Running   0          45m
kube-system              metrics-server-6c8c76d545-x2854             1/1     Running   0          45m
secretgen-controller     secretgen-controller-7df8ddbb7d-7ttw5       1/1     Running   0          21m
stacks-operator-system   controller-manager-7bd44486f9-vz6gp         1/1     Running   0          75s
次のコマンドで、TAP (TBS)のClusterBuildPack、ClusterStack、ClusterBuilderを確認します。現時点では何も作成されていないはずです。
$ kubectl get clusterbuildpack,clusterstack,clusterbuilder

No resources found
次に、TBSのfull dependenciesをインストールします。先にダウンロード済みのフル依存関係パッケージをECRにリロケートします。
ECR_REPO=$(aws ecr describe-repositories --region ${AWS_REGION} --query 'repositories[?repositoryName==`full-deps-package-repo`].repositoryUri' --output text)
aws ecr get-login-password --region ${AWS_REGION} | docker login ${ECR_REPO} -u AWS --password-stdin

tanzu package repository add full-deps-package-repo \
  --url ${ECR_REPO}:1.12.4 \
  --namespace tap-install
次のコマンドで、full dependenciesパッケージのレポジトリが正常に登録されていることを確認します。
$ tanzu package repository get full-deps-package-repo --namespace tap-install

NAMESPACE:               tap-install
NAME:                    full-deps-package-repo
SOURCE:                  (imgpkg) 798085859000.dkr.ecr.ap-northeast-1.amazonaws.com/full-deps-package-repo:1.12.4
STATUS:                  Reconcile succeeded
CONDITIONS:              - status: "True"
  type: ReconcileSucceeded
USEFUL-ERROR-MESSAGE:
次に、full dependenciesパッケージをインストールします。以下のコマンドを実行して、full dependenciesパッケージをインストールします。
tanzu package install full-deps -p full-deps.buildservice.tanzu.vmware.com -v "> 0.0.0" -n tap-install --values-file tap-values.yaml
インストールが完了したら、次のコマンドでパッケージのインストール状況を確認します。
$ tanzu package installed list -n tap-install

  NAME                         PACKAGE-NAME                                    PACKAGE-VERSION  STATUS
  base-jammy-builder           base-jammy-builder.buildpacks.tanzu.vmware.com  0.2.0            Reconcile succeeded
  base-jammy-stack             base-jammy-stack.buildpacks.tanzu.vmware.com    0.1.141          Reconcile succeeded
  buildservice                 buildservice.tanzu.vmware.com                   1.15.14          Reconcile succeeded
  dotnet-core-buildpack        dotnet-core.buildpacks.tanzu.vmware.com         3.4.3            Reconcile succeeded
  full-deps                    full-deps.buildservice.tanzu.vmware.com         1.12.82          Reconcile succeeded
  full-jammy-builder           full-jammy-builder.buildpacks.tanzu.vmware.com  0.2.0            Reconcile succeeded
  full-jammy-stack             full-jammy-stack.buildpacks.tanzu.vmware.com    0.1.220          Reconcile succeeded
  go-buildpack                 go.buildpacks.tanzu.vmware.com                  4.1.4            Reconcile succeeded
  java-buildpack               java.buildpacks.tanzu.vmware.com                10.2.0           Reconcile succeeded
  java-native-image-buildpack  java-native-image.buildpacks.tanzu.vmware.com   7.20.0           Reconcile succeeded
  nodejs-buildpack             nodejs.buildpacks.tanzu.vmware.com              4.4.2            Reconcile succeeded
  php-buildpack                php.buildpacks.tanzu.vmware.com                 3.3.3            Reconcile succeeded
  procfile-buildpack           procfile.buildpacks.tanzu.vmware.com            5.7.0            Reconcile succeeded
  python-buildpack             python.buildpacks.tanzu.vmware.com              3.1.4            Reconcile succeeded
  ruby-buildpack               ruby.buildpacks.tanzu.vmware.com                3.1.4            Reconcile succeeded
  tap                          tap.tanzu.vmware.com                            1.12.4           Reconcile succeeded
  tiny-jammy-builder           tiny-jammy-builder.buildpacks.tanzu.vmware.com  0.2.0            Reconcile succeeded
  tiny-jammy-stack             tiny-jammy-stack.buildpacks.tanzu.vmware.com    0.1.143          Reconcile succeeded
  web-servers-buildpack        web-servers.buildpacks.tanzu.vmware.com         1.1.4            Reconcile succeeded
次のコマンドで、ClusterBuildPack、ClusterStack、ClusterBuilderが作成されていることを確認します。READYになるまでしばらく時間がかかります。
$ kubectl get clusterbuildpack,clusterstack,clusterbuilder
NAME                                                 READY
clusterbuildpack.kpack.io/dotnet-core-3.4.3          True
clusterbuildpack.kpack.io/go-4.1.4                   True
clusterbuildpack.kpack.io/java-10.2.0                True
clusterbuildpack.kpack.io/java-native-image-7.20.0   True
clusterbuildpack.kpack.io/nodejs-4.4.2               True
clusterbuildpack.kpack.io/php-3.3.3                  True
clusterbuildpack.kpack.io/procfile-5.7.0             True
clusterbuildpack.kpack.io/python-3.1.4               True
clusterbuildpack.kpack.io/ruby-3.1.4                 True
clusterbuildpack.kpack.io/web-servers-1.1.4          True

NAME                               READY
clusterstack.kpack.io/base-jammy   True
clusterstack.kpack.io/default      True
clusterstack.kpack.io/full-jammy   True
clusterstack.kpack.io/tiny-jammy   True

NAME                                 LATESTIMAGE                                                                                                                                                      READY   UPTODATE
clusterbuilder.kpack.io/base-jammy   798085859000.dkr.ecr.ap-northeast-1.amazonaws.com/tap-build-service:base-jammy-builder@sha256:3dd104b5c781fad0623767f658f46b377d13650cf1751c17816b4a1cf670e422   True    True
clusterbuilder.kpack.io/default      798085859000.dkr.ecr.ap-northeast-1.amazonaws.com/tap-build-service:default-builder@sha256:bcf8d530ae6da12a3737581bc0d0a58659abd21a282d5d335c379a316d6f6020      True    True
clusterbuilder.kpack.io/full-jammy   798085859000.dkr.ecr.ap-northeast-1.amazonaws.com/tap-build-service:full-jammy-builder@sha256:8f4e88331dd03da007f50ec42b63384d9806863a72a0604bd097649d9c6d65b5   True    True
clusterbuilder.kpack.io/tiny-jammy   798085859000.dkr.ecr.ap-northeast-1.amazonaws.com/tap-build-service:tiny-jammy-builder@sha256:62f744c605004da3d52df12c650bae1d6b72f2cb71a0f161f1c25353b5c22672   True    True
これで、TAP(TBS)のインストールが完了しました。次に、サンプルアプリケーションのコンテナイメージをビルドして、TAP(TBS)を使用してデプロイします。
Hello Worldイメージのビルド
簡単なHello WorldアプリケーションをTBSでビルドしてみます。ECRを使う場合は、アプリごとにECRレポジトリを作成する必要があります。以下のコマンドで、サンプルアプリケーション用のECRレポジトリを作成する必要があります。
次のコマンドを実行して、サンプルアプリケーション用のnamespaceの作成、Service AccountのIRSA設定、ECRレポジトリを作成を行います。
NAMESPACE=demo
kubectl create ns ${NAMESPACE}
kubectl annotate serviceaccount -n ${NAMESPACE} default eks.amazonaws.com/role-arn=arn:aws:iam::${AWS_ACCOUNT_ID}:role/tap-workload-${EKS_CLUSTER_NAME}

aws ecr create-repository --repository-name tanzu-application-platform/hello-servlet-${NAMESPACE} --region $AWS_REGION
サンプルアプリのイメージを作成します。
ECR_REPO=${AWS_ACCOUNT_ID}.dkr.ecr.${AWS_REGION}.amazonaws.com/tanzu-application-platform/hello-servlet-${NAMESPACE}
aws ecr get-login-password --region ${AWS_REGION} | docker login ${ECR_REPO} -u AWS --password-stdin
kp image save hello-servlet -n demo --tag ${ECR_REPO} --git https://github.com/making/hello-servlet --git-revision master --wait
インストールの設定がうまくいっていれば、次のようなログが出力され、コンテナイメージがビルドされます。
Creating Image Resource...
Image Resource "hello-servlet" created
===> PREPARE
Build reason(s): CONFIG
CONFIG:
	resources: {}
	- source: {}
	+ source:
	+   git:
	+     revision: 5da5ae7686cac150b67a8431626997319e69f38b
	+     url: https://github.com/making/hello-servlet
Loading registry credentials from service account secrets
No registry credentials were loaded from service account secrets
Loading cluster credential helpers
Cloning "https://github.com/making/hello-servlet" @ "5da5ae7686cac150b67a8431626997319e69f38b"...
Successfully cloned "https://github.com/making/hello-servlet" @ "5da5ae7686cac150b67a8431626997319e69f38b" in path "/workspace"
===> ANALYZE
Image with name "798085859000.dkr.ecr.ap-northeast-1.amazonaws.com/tanzu-application-platform/hello-servlet-demo" not found
===> DETECT
target distro name/version labels not found, reading /etc/os-release file
10 of 44 buildpacks participating
tanzu-buildpacks/ca-certificates   3.9.3
tanzu-buildpacks/bellsoft-liberica 9.15.2
tanzu-buildpacks/syft              1.44.0
tanzu-buildpacks/maven             6.18.2
tanzu-buildpacks/executable-jar    6.11.2
tanzu-buildpacks/apache-tomcat     7.17.3
tanzu-buildpacks/apache-tomee      1.10.2
tanzu-buildpacks/liberty           3.10.4
tanzu-buildpacks/dist-zip          5.9.1
tanzu-buildpacks/spring-boot       5.32.0
===> RESTORE
Warning: No cached data will be used, no cache specified.
===> BUILD
target distro name/version labels not found, reading /etc/os-release file

Tanzu Buildpack for CA Certificates 3.9.3
  https://github.com/pivotal-cf/tanzu-ca-certificates
  Build Configuration:
    $BP_EMBED_CERTS                    Embed certificates into the image
    $BP_ENABLE_RUNTIME_CERT_BINDING    Deprecated: Enable/disable certificate helper layer to add certs at runtime
    $BP_RUNTIME_CERT_BINDING_DISABLED  Disable certificate helper layer to add certs at runtime
  Launch Helper: Contributing to layer
    Creating /layers/tanzu-buildpacks_ca-certificates/helper/exec.d/ca-certificates-helper

Tanzu Buildpack for BellSoft Liberica 9.15.2
  https://github.com/pivotal-cf/tanzu-bellsoft-liberica
  Build Configuration:
    $BP_JVM_JLINK_ARGS           --no-man-pages --no-header-files --strip-debug --compress=1  configure custom link arguments (--output must be omitted)
    $BP_JVM_JLINK_ENABLED        false                                                        enables running jlink tool to generate custom JRE
    $BP_JVM_TYPE                 JRE                                                          the JVM type - JDK or JRE
    $BP_JVM_VERSION              11                                                           the Java version
  Launch Configuration:
    $BPL_DEBUG_ENABLED           false                                                        enables Java remote debugging support
    $BPL_DEBUG_PORT              8000                                                         configure the remote debugging port
    $BPL_DEBUG_SUSPEND           false                                                        configure whether to suspend execution until a debugger has attached
    $BPL_HEAP_DUMP_PATH                                                                       write heap dumps on error to this path
    $BPL_JAVA_NMT_ENABLED        true                                                         enables Java Native Memory Tracking (NMT)
    $BPL_JAVA_NMT_LEVEL          summary                                                      configure level of NMT, summary or detail
    $BPL_JFR_ARGS                                                                             configure custom Java Flight Recording (JFR) arguments
    $BPL_JFR_ENABLED             false                                                        enables Java Flight Recording (JFR)
    $BPL_JMX_ENABLED             false                                                        enables Java Management Extensions (JMX)
    $BPL_JMX_PORT                5000                                                         configure the JMX port
    $BPL_JVM_HEAD_ROOM           0                                                            the headroom in memory calculation
    $BPL_JVM_LOADED_CLASS_COUNT  35% of classes                                               the number of loaded classes in memory calculation
    $BPL_JVM_THREAD_COUNT        250                                                          the number of threads in memory calculation
    $JAVA_TOOL_OPTIONS                                                                        the JVM launch flags
    Using buildpack default Java version 11
  BellSoft Liberica JDK 11.0.25: Contributing to layer
    Reusing cached download from buildpack
    Expanding to /layers/tanzu-buildpacks_bellsoft-liberica/jdk
    Adding 146 container CA certificates to JVM truststore
    Writing env.build/JAVA_HOME.override
    Writing env.build/JDK_HOME.override
  BellSoft Liberica JRE 11.0.25: Contributing to layer
    Reusing cached download from buildpack
    Expanding to /layers/tanzu-buildpacks_bellsoft-liberica/jre
    Adding 146 container CA certificates to JVM truststore
    Writing env.launch/BPI_APPLICATION_PATH.default
    Writing env.launch/BPI_JVM_CACERTS.default
    Writing env.launch/BPI_JVM_CLASS_COUNT.default
    Writing env.launch/BPI_JVM_SECURITY_PROVIDERS.default
    Writing env.launch/JAVA_HOME.default
    Writing env.launch/JAVA_TOOL_OPTIONS.append
    Writing env.launch/JAVA_TOOL_OPTIONS.delim
    Writing env.launch/MALLOC_ARENA_MAX.default
  Launch Helper: Contributing to layer
    Creating /layers/tanzu-buildpacks_bellsoft-liberica/helper/exec.d/java-opts
    Creating /layers/tanzu-buildpacks_bellsoft-liberica/helper/exec.d/jvm-heap
    Creating /layers/tanzu-buildpacks_bellsoft-liberica/helper/exec.d/link-local-dns
    Creating /layers/tanzu-buildpacks_bellsoft-liberica/helper/exec.d/memory-calculator
    Creating /layers/tanzu-buildpacks_bellsoft-liberica/helper/exec.d/security-providers-configurer
    Creating /layers/tanzu-buildpacks_bellsoft-liberica/helper/exec.d/jmx
    Creating /layers/tanzu-buildpacks_bellsoft-liberica/helper/exec.d/jfr
    Creating /layers/tanzu-buildpacks_bellsoft-liberica/helper/exec.d/openssl-certificate-loader
    Creating /layers/tanzu-buildpacks_bellsoft-liberica/helper/exec.d/security-providers-classpath-9
    Creating /layers/tanzu-buildpacks_bellsoft-liberica/helper/exec.d/debug-9
    Creating /layers/tanzu-buildpacks_bellsoft-liberica/helper/exec.d/nmt
    Creating /layers/tanzu-buildpacks_bellsoft-liberica/helper/exec.d/active-processor-count
  Java Security Properties: Contributing to layer
    Writing env.launch/JAVA_SECURITY_PROPERTIES.default
    Writing env.launch/JAVA_TOOL_OPTIONS.append
    Writing env.launch/JAVA_TOOL_OPTIONS.delim

Tanzu Buildpack for Syft 1.44.0
  https://github.com/pivotal-cf/tanzu-syft
    Reusing cached download from buildpack
    Writing env.build/SYFT_CHECK_FOR_APP_UPDATE.default

Tanzu Buildpack for Maven 6.18.2
  https://github.com/pivotal-cf/tanzu-maven
  Build Configuration:
    $BP_EXCLUDE_FILES                                                                            colon separated list of glob patterns, matched source files are removed
    $BP_INCLUDE_FILES                                                                            colon separated list of glob patterns, matched source files are included
    $BP_JAVA_INSTALL_NODE                 false                                                  whether to install Yarn/Node binaries based on the presence of a package.json or yarn.lock file
    $BP_MAVEN_ACTIVE_PROFILES                                                                    the active profiles (comma separated: such as: p1,!p2,?p3) to pass to Maven
    $BP_MAVEN_ADDITIONAL_BUILD_ARGUMENTS                                                         the additionnal arguments (appended to BP_MAVEN_BUILD_ARGUMENTS) to pass to Maven
    $BP_MAVEN_BUILD_ARGUMENTS             -Dmaven.test.skip=true --no-transfer-progress package  the arguments to pass to Maven
    $BP_MAVEN_BUILT_ARTIFACT              target/*.[ejw]ar                                       the built application artifact explicitly.  Supersedes $BP_MAVEN_BUILT_MODULE
    $BP_MAVEN_BUILT_MODULE                                                                       the module to find application artifact in
    $BP_MAVEN_DAEMON_ENABLED              false                                                  use maven daemon
    $BP_MAVEN_POM_FILE                    pom.xml                                                the location of the main pom.xml file, relative to the application root
    $BP_MAVEN_SETTINGS_PATH                                                                      the path to a Maven settings file
    $BP_MAVEN_VERSION                     3                                                      the Maven version
    $BP_NODE_PROJECT_PATH                                                                        configure a project subdirectory to look for `package.json` and `yarn.lock` files
    Creating cache directory /home/cnb/.m2
  Compiled Application: Contributing to layer
    Executing mvnw --batch-mode -Dmaven.test.skip=true --no-transfer-progress package
      Downloading https://repo1.maven.org/maven2/org/apache/maven/apache-maven/3.6.2/apache-maven-3.6.2-bin.zip
      ..........................................................................................................................................................................................................................................................................................................................................................................................................................................................................
      Unzipping /home/cnb/.m2/wrapper/dists/apache-maven-3.6.2-bin/664rr97se3slubllb7r6fll7u/apache-maven-3.6.2-bin.zip to /home/cnb/.m2/wrapper/dists/apache-maven-3.6.2-bin/664rr97se3slubllb7r6fll7u
      Set executable permissions for: /home/cnb/.m2/wrapper/dists/apache-maven-3.6.2-bin/664rr97se3slubllb7r6fll7u/apache-maven-3.6.2/bin/mvn
      [INFO] Scanning for projects...
      [INFO]
      [INFO] ------------------< com.example.hello:hello-servlet >-------------------
      [INFO] Building hello-servlet 0.0.1-SNAPSHOT
      [INFO] --------------------------------[ war ]---------------------------------
      [INFO]
      [INFO] --- maven-resources-plugin:2.6:resources (default-resources) @ hello-servlet ---
      [WARNING] Using platform encoding (ANSI_X3.4-1968 actually) to copy filtered resources, i.e. build is platform dependent!
      [INFO] skip non existing resourceDirectory /workspace/src/main/resources
      [INFO]
      [INFO] --- maven-compiler-plugin:3.8.1:compile (default-compile) @ hello-servlet ---
      [INFO] Changes detected - recompiling the module!
      [WARNING] File encoding has not been set, using platform encoding ANSI_X3.4-1968, i.e. build is platform dependent!
      [INFO] Compiling 1 source file to /workspace/target/classes
      [INFO]
      [INFO] --- maven-resources-plugin:2.6:testResources (default-testResources) @ hello-servlet ---
      [INFO] Not copying test resources
      [INFO]
      [INFO] --- maven-compiler-plugin:3.8.1:testCompile (default-testCompile) @ hello-servlet ---
      [INFO] Not compiling test sources
      [INFO]
      [INFO] --- maven-surefire-plugin:2.12.4:test (default-test) @ hello-servlet ---
      [INFO] Tests are skipped.
      [INFO]
      [INFO] --- maven-war-plugin:3.3.1:war (default-war) @ hello-servlet ---
      [INFO] Packaging webapp
      [INFO] Assembling webapp [hello-servlet] in [/workspace/target/ROOT]
      [INFO] Processing war project
      [INFO] Building war: /workspace/target/ROOT.war
      [INFO] ------------------------------------------------------------------------
      [INFO] BUILD SUCCESS
      [INFO] ------------------------------------------------------------------------
      [INFO] Total time:  6.407 s
      [INFO] Finished at: 2025-05-27T05:20:20Z
      [INFO] ------------------------------------------------------------------------

  Removing source code
  Restoring application artifact

Tanzu Buildpack for Apache Tomcat 7.17.3
  https://github.com/pivotal-cf/tanzu-apache-tomcat
  Build Configuration:
    $BP_JAVA_APP_SERVER                             the application server to use
    $BP_TOMCAT_CONTEXT_PATH                         the application context path
    $BP_TOMCAT_ENV_PROPERTY_SOURCE_DISABLED  false  Disable Tomcat's EnvironmentPropertySource
    $BP_TOMCAT_EXT_CONF_SHA256                      the SHA256 hash of the external Tomcat configuration archive
    $BP_TOMCAT_EXT_CONF_STRIP                0      the number of directory components to strip from the external Tomcat configuration archive
    $BP_TOMCAT_EXT_CONF_URI                         the download location of the external Tomcat configuration
    $BP_TOMCAT_EXT_CONF_VERSION                     the version of the external Tomcat configuration
    $BP_TOMCAT_VERSION                       9.*    the Tomcat version
  Launch Configuration:
    $BPL_TOMCAT_ACCESS_LOGGING_ENABLED              the Tomcat access logging state
  Apache Tomcat 9.0.102: Contributing to layer
    Reusing cached download from buildpack
    Expanding to /layers/tanzu-buildpacks_apache-tomcat/tomcat
    Writing env.launch/CATALINA_HOME.default
  Launch Helper: Contributing to layer
    Creating /layers/tanzu-buildpacks_apache-tomcat/helper/exec.d/access-logging-support
  Apache Tomcat Support: Contributing to layer
    Copying context.xml to /layers/tanzu-buildpacks_apache-tomcat/catalina-base/conf
    Copying logging.properties to /layers/tanzu-buildpacks_apache-tomcat/catalina-base/conf
    Copying server.xml to /layers/tanzu-buildpacks_apache-tomcat/catalina-base/conf
    Copying web.xml to /layers/tanzu-buildpacks_apache-tomcat/catalina-base/conf
  Apache Tomcat Access Logging Support 3.4.0
    Reusing cached download from buildpack
    Copying to /layers/tanzu-buildpacks_apache-tomcat/catalina-base/lib
  Apache Tomcat Lifecycle Support 3.4.0
    Reusing cached download from buildpack
    Copying to /layers/tanzu-buildpacks_apache-tomcat/catalina-base/lib
  Apache Tomcat Logging Support 3.4.0
    Reusing cached download from buildpack
    Copying to /layers/tanzu-buildpacks_apache-tomcat/catalina-base/bin
    Writing /layers/tanzu-buildpacks_apache-tomcat/catalina-base/bin/setenv.sh
  Mounting application at ROOT
    Writing env.launch/CATALINA_BASE.default
    Writing env.launch/CATALINA_OPTS.default
    Writing env.launch/CATALINA_TMPDIR.default
  Process types:
    task:   sh /layers/tanzu-buildpacks_apache-tomcat/tomcat/bin/catalina.sh run (direct)
    tomcat: sh /layers/tanzu-buildpacks_apache-tomcat/tomcat/bin/catalina.sh run (direct)
    web:    sh /layers/tanzu-buildpacks_apache-tomcat/tomcat/bin/catalina.sh run (direct)
===> EXPORT
Warning: No cached data will be used, no cache specified.
Adding layer 'tanzu-buildpacks/ca-certificates:helper'
Adding layer 'tanzu-buildpacks/bellsoft-liberica:helper'
Adding layer 'tanzu-buildpacks/bellsoft-liberica:java-security-properties'
Adding layer 'tanzu-buildpacks/bellsoft-liberica:jre'
Adding layer 'tanzu-buildpacks/apache-tomcat:catalina-base'
Adding layer 'tanzu-buildpacks/apache-tomcat:helper'
Adding layer 'tanzu-buildpacks/apache-tomcat:tomcat'
Adding layer 'buildpacksio/lifecycle:launch.sbom'
Added 1/1 app layer(s)
Adding layer 'buildpacksio/lifecycle:launcher'
Adding layer 'buildpacksio/lifecycle:config'
Adding layer 'buildpacksio/lifecycle:process-types'
Adding label 'io.buildpacks.lifecycle.metadata'
Adding label 'io.buildpacks.build.metadata'
Adding label 'io.buildpacks.project.metadata'
Setting default process type 'web'
Saving 798085859000.dkr.ecr.ap-northeast-1.amazonaws.com/tanzu-application-platform/hello-servlet-demo...
*** Images (sha256:cf06406d70674d04e32c5c68d0185e4f8015d5552be3facedba56f9b09b9dd8c):
      798085859000.dkr.ecr.ap-northeast-1.amazonaws.com/tanzu-application-platform/hello-servlet-demo
      798085859000.dkr.ecr.ap-northeast-1.amazonaws.com/tanzu-application-platform/hello-servlet-demo:b1.20250527.051602
===> COMPLETION
Build successful
次のコマンドで、イメージが正常にビルドされたことを確認します。
$ kp image list -n demo
NAME             READY    LATEST REASON    LATEST IMAGE                                                                                                                                                               NAMESPACE
hello-servlet    True     CONFIG           798085859000.dkr.ecr.ap-northeast-1.amazonaws.com/tanzu-application-platform/hello-servlet-demo@sha256:cf06406d70674d04e32c5c68d0185e4f8015d5552be3facedba56f9b09b9dd8c    demo

$ kp build list -n demo
BUILD    STATUS     BUILT IMAGE                                                                                                                                                                REASON    IMAGE RESOURCE
1        SUCCESS    798085859000.dkr.ecr.ap-northeast-1.amazonaws.com/tanzu-application-platform/hello-servlet-demo@sha256:cf06406d70674d04e32c5c68d0185e4f8015d5552be3facedba56f9b09b9dd8c    CONFIG    hello-servlet
完了したらdockerで起動して動作確認します。
docker run --rm -p 8080:8080 798085859000.dkr.ecr.ap-northeast-1.amazonaws.com/tanzu-application-platform/hello-servlet-demo
次のコマンドで、アプリケーションが正常に起動していることを確認します。
$ curl localhost:8080
Hello World!