VMware Tanzu for Postgres 18.2をRocky Linuxにインストールするメモ
VMware Tanzu for Postgres 18.2をRocky Linux 9にインストールする手順をメモします。
目次
VMware Tanzu for Postgresのダウンロード
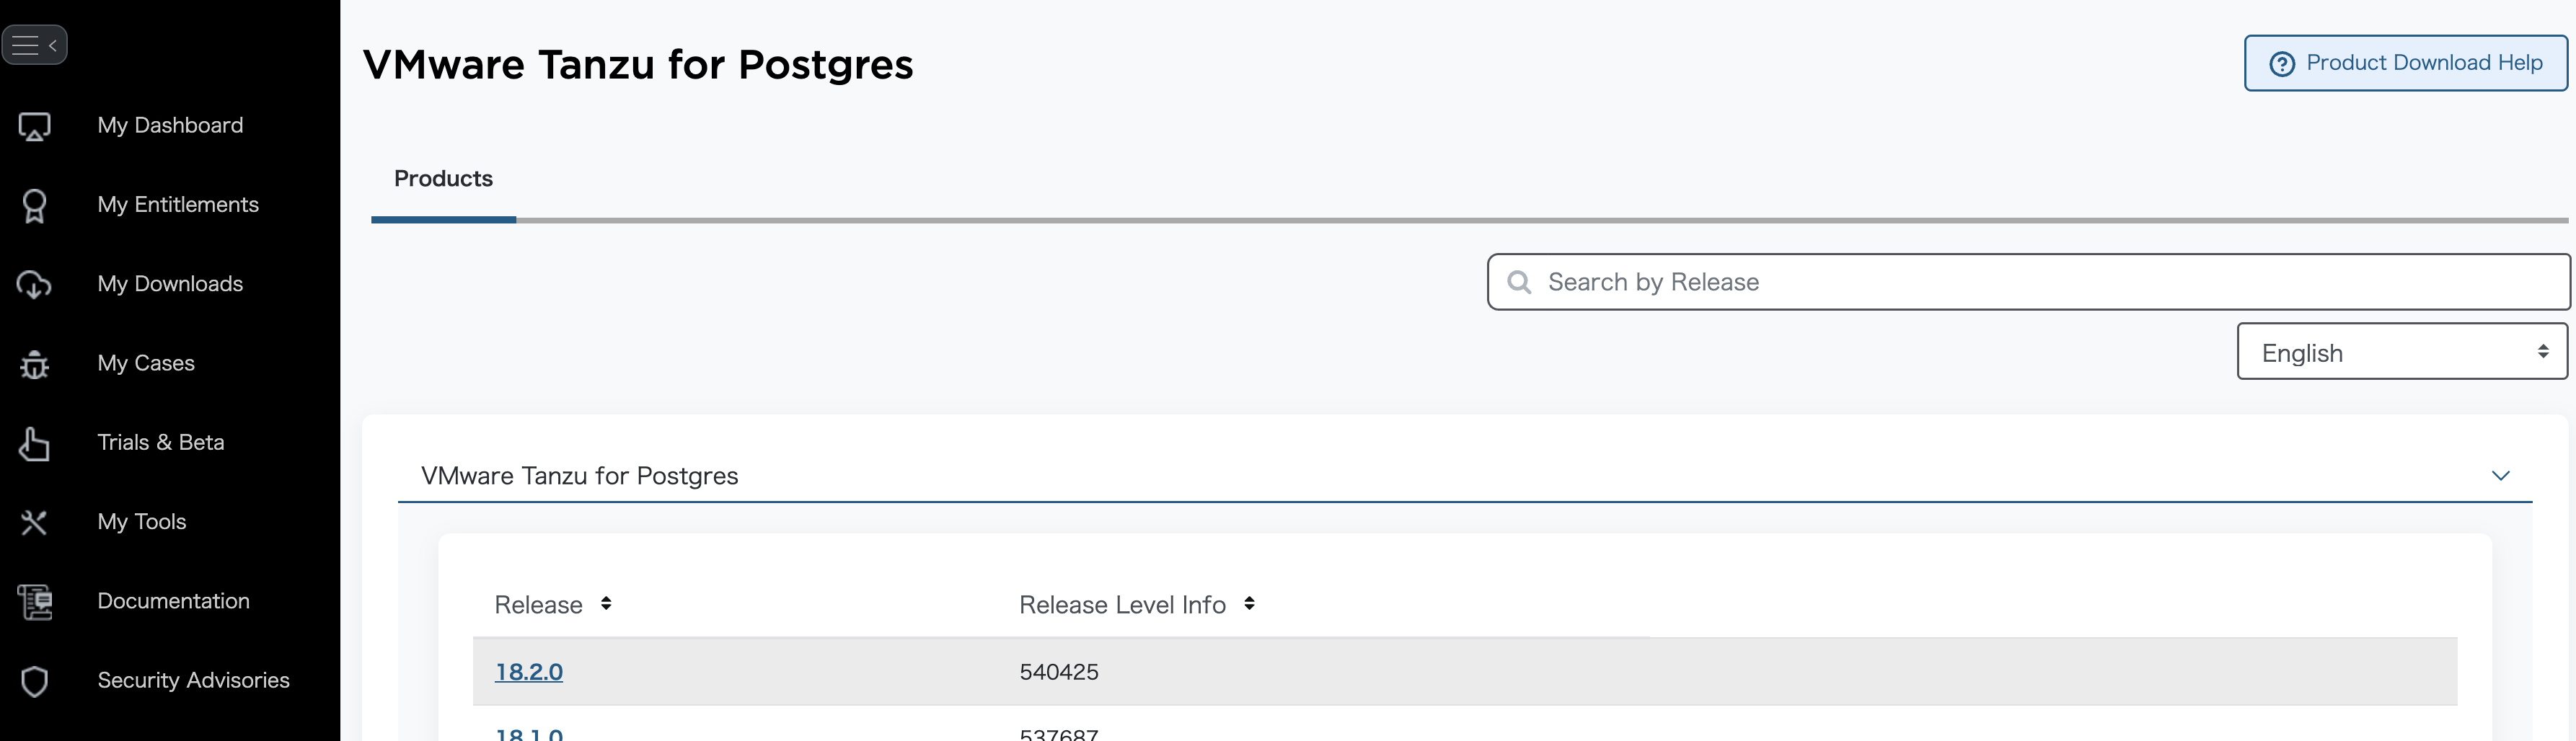
Broadcom Supportにログインして、VMware Tanzu for Postgresのダウンロードページにアクセスします。
最新バージョンを選択します。
"I agree to the Terms and Conditions"にチェックを入れて、

EL9用のインストーラーを~/Downloadsにダウンロードします。

cd ~/Downloads
mkdir -p vmware-postgres-18.2.0
unzip -d vmware-postgres-18.2.0 vmware-postgres-18.2.0.el9.x86_64.zip
Rocky Linux 9へのインストール
Rocky Linux 9環境はOrbStackのLinux Machineを使って構築します。
VMware Tanzu for Postgresはx86_64にしか対応していないので、x86_64エミュレーションを使ってRocky Linux 9マシンを作成します。
orb create -a amd64 rocky:9 tanzu-postgres
orb shell -m tanzu-postgres
ドキュメントには書いてありませんでしたが、VMware Tanzu for Postgresのインストールにはlibssh2パッケージが必要でした。
libssh2パッケージをインストールするにはEPEL(Extra Packages for Enterprise Linux)リポジトリを有効化する必要があります。
sudo dnf install epel-release -y
メタデータを更新します。
sudo dnf clean all
sudo dnf makecache
libssh2(その他、あると便利な)パッケージをインストールします。
sudo dnf install libssh2 which lsof vim -y
VMware Tanzu for Postgresのインストール
VMware Tanzu for Postgresのrpmパッケージをインストールします。
cd /Users/$USER/Downloads/vmware-postgres-18.2.0
sudo dnf install ./vmware-postgres18-18.2-1.el9.x86_64.rpm ./vmware-postgres18-libs-18.2-1.el9.x86_64.rpm -y
postgresユーザーができるので、ユーザーを切り替えてデータベースを初期化します。
sudo su - postgres
データベースを初期化します。
initdb -D /var/lib/pgsql/data
一旦、元のユーザーに戻ります。
exit
systemdサービスファイルの作成
VMware Tanzu for Postgresにはサービス化のためのsystemdユニットファイルが含まれていないので、自分で作成します。
cat <<'EOF' | sudo tee /etc/systemd/system/postgresql.service > /dev/null
[Unit]
Description=VMware Tanzu for Postgres
After=network.target

[Service]
Type=forking
User=postgres
Group=postgres

ExecStart=/opt/vmware/postgres/18/bin/pg_ctl start -D /var/lib/pgsql/data -l /var/lib/pgsql/data/logfile
ExecStop=/opt/vmware/postgres/18/bin/pg_ctl stop -D /var/lib/pgsql/data
ExecReload=/opt/vmware/postgres/18/bin/pg_ctl reload -D /var/lib/pgsql/data

TimeoutSec=300

[Install]
WantedBy=multi-user.target
EOF
systemdデーモンをリロードして、PostgreSQLサービスを有効化・起動します。
sudo systemctl daemon-reload
sudo systemctl enable postgresql
sudo systemctl start postgresql
sudo systemctl status postgresql
PostgreSQLが起動していることを確認します。
$ sudo lsof -i -n -P | grep -i listen
postgres 1700 postgres    9u  IPv6 49812992      0t0  TCP [::1]:5432 (LISTEN)
postgres 1700 postgres   10u  IPv4 49812993      0t0  TCP 127.0.0.1:5432 (LISTEN)
postgresユーザーに切り替えて、PostgreSQLに接続します。
sudo su - postgres
$ psql
psql (18.2 (VMware Postgres 18.2.0))
Type "help" for help.

postgres=#
初期状態を確認します。
postgres=# SELECT version();
                                                                version
----------------------------------------------------------------------------------------------------------------------------------------
 PostgreSQL 18.2 (VMware Postgres 18.2.0) on x86_64-redhat-linux-gnu, compiled by gcc (GCC) 11.5.0 20240719 (Red Hat 11.5.0-11), 64-bit
(1 row)

postgres=# \l
                                                    List of databases
   Name    |  Owner   | Encoding | Locale Provider |  Collate   |   Ctype    | Locale | ICU Rules |   Access privileges
-----------+----------+----------+-----------------+------------+------------+--------+-----------+-----------------------
 postgres  | postgres | UTF8     | libc            | en_US.utf8 | en_US.utf8 |        |           |
 template0 | postgres | UTF8     | libc            | en_US.utf8 | en_US.utf8 |        |           | =c/postgres          +
           |          |          |                 |            |            |        |           | postgres=CTc/postgres
 template1 | postgres | UTF8     | libc            | en_US.utf8 | en_US.utf8 |        |           | =c/postgres          +
           |          |          |                 |            |            |        |           | postgres=CTc/postgres
(3 rows)

postgres=# \d
Did not find any relations.
利用可能な拡張機能を確認します。
postgres=# SELECT * FROM pg_available_extensions ORDER BY name;
        name        | default_version | installed_version |                                comment
--------------------+-----------------+-------------------+------------------------------------------------------------------------
 amcheck            | 1.5             |                   | functions for verifying relation integrity
 autoinc            | 1.0             |                   | functions for autoincrementing fields
 bloom              | 1.0             |                   | bloom access method - signature file based index
 bool_plperl        | 1.0             |                   | transform between bool and plperl
 bool_plperlu       | 1.0             |                   | transform between bool and plperlu
 btree_gin          | 1.3             |                   | support for indexing common datatypes in GIN
 btree_gist         | 1.8             |                   | support for indexing common datatypes in GiST
 citext             | 1.8             |                   | data type for case-insensitive character strings
 cube               | 1.5             |                   | data type for multidimensional cubes
 dblink             | 1.2             |                   | connect to other PostgreSQL databases from within a database
 dict_int           | 1.0             |                   | text search dictionary template for integers
 dict_xsyn          | 1.0             |                   | text search dictionary template for extended synonym processing
 earthdistance      | 1.2             |                   | calculate great-circle distances on the surface of the Earth
 file_fdw           | 1.0             |                   | foreign-data wrapper for flat file access
 fuzzystrmatch      | 1.2             |                   | determine similarities and distance between strings
 hstore             | 1.8             |                   | data type for storing sets of (key, value) pairs
 hstore_plperl      | 1.0             |                   | transform between hstore and plperl
 hstore_plperlu     | 1.0             |                   | transform between hstore and plperlu
 hstore_plpython3u  | 1.0             |                   | transform between hstore and plpython3u
 insert_username    | 1.0             |                   | functions for tracking who changed a table
 intagg             | 1.1             |                   | integer aggregator and enumerator (obsolete)
 intarray           | 1.5             |                   | functions, operators, and index support for 1-D arrays of integers
 isn                | 1.3             |                   | data types for international product numbering standards
 jsonb_plperl       | 1.0             |                   | transform between jsonb and plperl
 jsonb_plperlu      | 1.0             |                   | transform between jsonb and plperlu
 jsonb_plpython3u   | 1.0             |                   | transform between jsonb and plpython3u
 lo                 | 1.2             |                   | Large Object maintenance
 ltree              | 1.3             |                   | data type for hierarchical tree-like structures
 ltree_plpython3u   | 1.0             |                   | transform between ltree and plpython3u
 moddatetime        | 1.0             |                   | functions for tracking last modification time
 pageinspect        | 1.13            |                   | inspect the contents of database pages at a low level
 pg_buffercache     | 1.6             |                   | examine the shared buffer cache
 pg_freespacemap    | 1.3             |                   | examine the free space map (FSM)
 pg_logicalinspect  | 1.0             |                   | functions to inspect logical decoding components
 pg_prewarm         | 1.2             |                   | prewarm relation data
 pg_stat_statements | 1.12            |                   | track planning and execution statistics of all SQL statements executed
 pg_surgery         | 1.0             |                   | extension to perform surgery on a damaged relation
 pg_trgm            | 1.6             |                   | text similarity measurement and index searching based on trigrams
 pg_visibility      | 1.2             |                   | examine the visibility map (VM) and page-level visibility info
 pg_walinspect      | 1.1             |                   | functions to inspect contents of PostgreSQL Write-Ahead Log
 pgcrypto           | 1.4             |                   | cryptographic functions
 pgrowlocks         | 1.2             |                   | show row-level locking information
 pgstattuple        | 1.5             |                   | show tuple-level statistics
 plperl             | 1.0             |                   | PL/Perl procedural language
 plperlu            | 1.0             |                   | PL/PerlU untrusted procedural language
 plpgsql            | 1.0             | 1.0               | PL/pgSQL procedural language
 plpython3u         | 1.0             |                   | PL/Python3U untrusted procedural language
 postgres_fdw       | 1.2             |                   | foreign-data wrapper for remote PostgreSQL servers
 refint             | 1.0             |                   | functions for implementing referential integrity (obsolete)
 seg                | 1.4             |                   | data type for representing line segments or floating-point intervals
 sslinfo            | 1.2             |                   | information about SSL certificates
 tablefunc          | 1.0             |                   | functions that manipulate whole tables, including crosstab
 tcn                | 1.0             |                   | Triggered change notifications
 tsm_system_rows    | 1.0             |                   | TABLESAMPLE method which accepts number of rows as a limit
 tsm_system_time    | 1.0             |                   | TABLESAMPLE method which accepts time in milliseconds as a limit
 unaccent           | 1.1             |                   | text search dictionary that removes accents
 uuid-ossp          | 1.1             |                   | generate universally unique identifiers (UUIDs)
 vector             | 0.8.1           |                   | vector data type and ivfflat and hnsw access methods
 xml2               | 1.2             |                   | XPath querying and XSLT
(59 rows)
サポートされている拡張一覧はこちらです。18.1には含まれていなかったpgvectorが復活しました。
PostgreSQL 18から導入されたuuidv7関数を試してみます。
postgres=# SELECT uuidv7();
                uuidv7
--------------------------------------
 019b8e14-dd7e-79dd-a6d8-65a20839934e
(1 row)
データベースとユーザーの作成
Vultrのガイドを参考に、hospitalデータベースとdb_managerユーザーを作成し、適切な権限を付与します。
psql -c "CREATE DATABASE hospital;"
psql -c "CREATE ROLE db_manager WITH LOGIN PASSWORD 'strong-password';"
psql -d hospital -c "
GRANT ALL PRIVILEGES ON DATABASE hospital TO db_manager;
GRANT USAGE, CREATE ON SCHEMA public TO db_manager;
ALTER DEFAULT PRIVILEGES IN SCHEMA public GRANT ALL PRIVILEGES ON TABLES TO db_manager;
ALTER DEFAULT PRIVILEGES IN SCHEMA public GRANT ALL PRIVILEGES ON SEQUENCES TO db_manager;
"
テーブルを作成し、データを挿入して、クエリを実行してみます。
psql -d hospital -c "CREATE TABLE doctors(
doctor_id SERIAL PRIMARY KEY,
first_name VARCHAR(50),
last_name VARCHAR(50),
appointment_date DATE
);"
psql -d hospital -c "INSERT INTO doctors (first_name, last_name, appointment_date) VALUES
('John', 'Doe', '2024-10-01'),
('Jane', 'Smith', '2024-10-02'),
('Emily', 'Johnson', '2024-10-03'),
('Michael', 'Brown', '2024-10-04'),
('Sarah', 'Davis', '2024-10-05');"
psql -d hospital -c "SELECT * FROM doctors WHERE appointment_date >= '2024-10-03';"
 doctor_id | first_name | last_name | appointment_date
-----------+------------+-----------+------------------
         3 | Emily      | Johnson   | 2024-10-03
         4 | Michael    | Brown     | 2024-10-04
         5 | Sarah      | Davis     | 2024-10-05
(3 rows)
リモート接続を有効化します。
echo "host    hospital    db_manager    0.0.0.0/0    scram-sha-256" >> /var/lib/pgsql/data/pg_hba.conf
sed -i "s/#listen_addresses = 'localhost'/listen_addresses = '*'/" /var/lib/pgsql/data/postgresql.conf
PostgreSQLサービスを再起動します。
exit
sudo systemctl restart postgresql
pg_hba.confの設定を確認します。
$ sudo -u postgres /opt/vmware/postgres/18/bin/psql -c "SELECT * FROM pg_hba_file_rules;"
 rule_number |            file_name            | line_number | type  |   database    |  user_name   |  address  |                 netmask                 |  auth_method  | options | error
-------------+---------------------------------+-------------+-------+---------------+--------------+-----------+-----------------------------------------+---------------+---------+-------
           1 | /var/lib/pgsql/data/pg_hba.conf |         117 | local | {all}         | {all}        |           |                                         | trust         |         |
           2 | /var/lib/pgsql/data/pg_hba.conf |         119 | host  | {all}         | {all}        | 127.0.0.1 | 255.255.255.255                         | trust         |         |
           3 | /var/lib/pgsql/data/pg_hba.conf |         121 | host  | {all}         | {all}        | ::1       | ffff:ffff:ffff:ffff:ffff:ffff:ffff:ffff | trust         |         |
           4 | /var/lib/pgsql/data/pg_hba.conf |         124 | local | {replication} | {all}        |           |                                         | trust         |         |
           5 | /var/lib/pgsql/data/pg_hba.conf |         125 | host  | {replication} | {all}        | 127.0.0.1 | 255.255.255.255                         | trust         |         |
           6 | /var/lib/pgsql/data/pg_hba.conf |         126 | host  | {replication} | {all}        | ::1       | ffff:ffff:ffff:ffff:ffff:ffff:ffff:ffff | trust         |         |
           7 | /var/lib/pgsql/data/pg_hba.conf |         127 | host  | {hospital}    | {db_manager} | 0.0.0.0   | 0.0.0.0                                 | scram-sha-256 |         |
(7 rows)
リモート接続を確認します。まずはローカルホストで。
$ /opt/vmware/postgres/18/bin/psql "postgresql://db_manager:strong-password@localhost:5432/hospital"
psql (18.2 (VMware Postgres 18.2.0))
Type "help" for help.

hospital=>
次に、Rocky LinuxマシンのIPアドレスを調べて、そのIPアドレスを使ってリモート接続を試みます。
$ ip addr | grep eth0 | tail -1 | awk '{print $2}' | awk -F '/' '{print $1}'
192.168.139.15
$ /opt/vmware/postgres/18/bin/psql "postgresql://db_manager:strong-password@192.168.139.15:5432/hospital"
psql (18.2 (VMware Postgres 18.2.0))
Type "help" for help.

hospital=>
データを確認します。
hospital=> select * from doctors;
 doctor_id | first_name | last_name | appointment_date
-----------+------------+-----------+------------------
         1 | John       | Doe       | 2024-10-01
         2 | Jane       | Smith     | 2024-10-02
         3 | Emily      | Johnson   | 2024-10-03
         4 | Michael    | Brown     | 2024-10-04
         5 | Sarah      | Davis     | 2024-10-05
(5 rows)
pg_hint_plan拡張機能のインストール
VMware Tanzu for Postgresでpg_hint_plan拡張機能を使用するには、次の手順に従います。pg_hint_planはクエリプランナーにヒントを与えるための拡張機能です。
cd /Users/$USER/Downloads/vmware-postgres-18.2.0
sudo dnf install ./vmware-postgres18-pg_hint_plan-extension-1.8.0-5.el9.x86_64.rpm -y
sudo sed -i "s/#shared_preload_libraries = ''/shared_preload_libraries = 'pg_hint_plan'/" /var/lib/pgsql/data/postgresql.conf
sudo systemctl restart postgresql
pg_hint_plan拡張機能が利用可能であることを確認します。
$ sudo -u postgres /opt/vmware/postgres/18/bin/psql -c "SELECT * FROM pg_available_extensions WHERE name LIKE '%hint%';"
     name     | default_version | installed_version |            comment
--------------+-----------------+-------------------+--------------------------------
 pg_hint_plan | 1.8.0           |                   | optimizer hints for PostgreSQL
(1 row)
Linux Machineの削除
orb delete tanzu-postgres -f
以上で、VMware Tanzu for Postgres 18.2をRocky Linux 9にインストールし、基本的な設定と操作を行う手順のメモを終わります。
Patroniを使ったHA構成も試してみたいところですが、今回はここまでとします。→ こちらの記事に書きました