VMware Tanzu for Postgres 18.2をPatroniによるHA構成でRocky Linuxにインストールするメモ
VMware Tanzu for Postgres 18.2をRocky Linux 9上にPatroniによるHA構成でインストールするメモです。
本記事ではOrbStackのLinux Machineを使用して、以下の構成を構築します。HAProxy以外は公式ドキュメントの推奨構成です。
- Etcdクラスター: 3ノード (
etcd-1,etcd-2,etcd-3) - PostgreSQL + Patroniクラスター: 3ノード (
postgres-1,postgres-2,postgres-3) - HAProxyロードバランサー: 1ノード (
haproxy)
OrbStackの仕様上、Firewallは無効化されている前提で進めます。必要に応じて適宜ポートを開放してください。
目次
VMware Tanzu for Postgresのダウンロード
Broadcom Supportにログインして、VMware Tanzu for Postgresのダウンロードページにアクセスします。
最新バージョンを選択します。
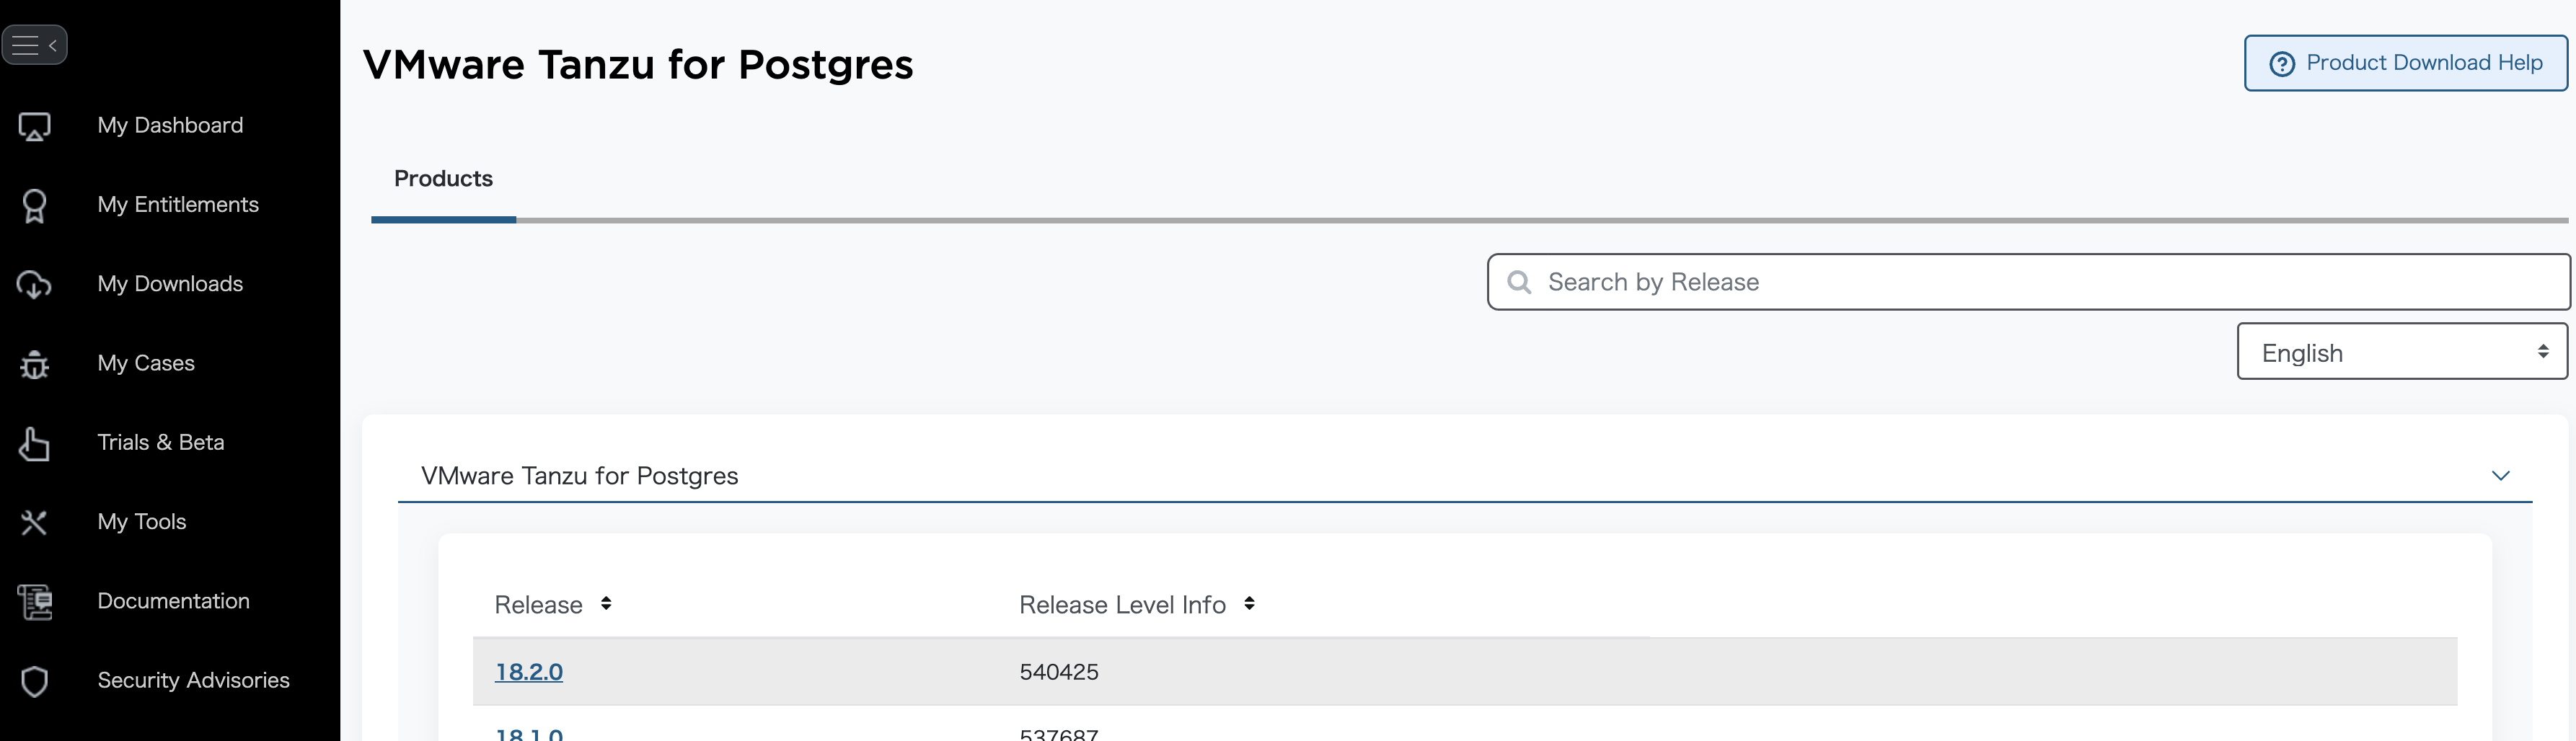
"I agree to the Terms and Conditions"にチェックを入れて、

EL9用のインストーラーを~/Downloadsにダウンロードします。

cd ~/Downloads
mkdir -p vmware-postgres-18.2.0
unzip -d vmware-postgres-18.2.0 vmware-postgres-18.2.0.el9.x86_64.zip
Etcd クラスターの構築
PatroniはDCS(Distributed Configuration Store)としてEtcdを使用し、クラスターのリーダー選出や構成管理を行います。ここでは3ノードのEtcdクラスターを構築します。
まず、1台目のEtcd用のLinux Machineを作成してシェルに入ります。
orb create -a amd64 rocky:9 etcd-1
orb shell -m etcd-1
Etcd用のシステムユーザーとグループを作成し、データディレクトリを準備します。
sudo groupadd --system etcd
sudo useradd -s /sbin/nologin --system -g etcd etcd
sudo mkdir -p /var/lib/etcd /etc/etcd
sudo chown -R etcd:etcd /var/lib/etcd
sudo chmod 750 /var/lib/etcd
VMware Tanzu for Postgresに同梱されているEtcdのRPMパッケージをインストールします。OrbStackのLinux Machineではホストの/Usersがマウントされているため、ホスト側でダウンロードしたファイルにそのままアクセスできます。
cd /Users/$USER/Downloads/vmware-postgres-18.2.0
sudo dnf install -y vmware-postgres-etcd-3.6.7-2.el9.x86_64.rpm
Etcdをsystemdサービスとして管理するためのユニットファイルを作成します。
sudo tee /etc/systemd/system/etcd.service <<'EOF'
[Unit]
Description=etcd distributed reliable key-value store
After=network-online.target
Wants=network-online.target

[Service]
Type=notify
User=etcd
Group=etcd
ExecStart=/opt/vmware/etcd/bin/etcd --config-file /etc/etcd/etcd.yaml
Restart=on-failure
RestartSec=10s
LimitNOFILE=65536

[Install]
WantedBy=multi-user.target
EOF

sudo systemctl daemon-reload
1台目の設定が完了したので、シェルを抜けます。
exit
orb cloneで1台目のマシンをクローンして、残り2台のEtcdノードを作成します。
orb clone etcd-1 etcd-2
orb clone etcd-1 etcd-3
クローンしたマシンを起動します。
orb start etcd-2
orb start etcd-3
各ノードのIPアドレスを確認します。このIPアドレスは後ほどEtcdの設定ファイルで使用します。
$ orb list
NAME    STATE    DISTRO      VERSION  ARCH   SIZE  IP
----    -----    ------      -------  ----   ----  --
etcd-1  running  rockylinux  9        amd64        192.168.139.78
etcd-2  running  rockylinux  9        amd64        192.168.139.203
etcd-3  running  rockylinux  9        amd64        192.168.139.214
generate_etcd_configs.sh を作成して、各ノードのetcd設定ファイルを自動生成します。
#!/bin/bash

# ノード定義
hosts=("etcd-1" "etcd-2" "etcd-3")
addrs=("192.168.139.78" "192.168.139.203" "192.168.139.214")

count=${#hosts[@]}

for i in "${!hosts[@]}"; do
  instance_hostname="${hosts[$i]}"
  instance_address="${addrs[$i]}"

  # 残り2ノードをa, bとして取得
  others=()
  for j in "${!hosts[@]}"; do
    [[ $i -ne $j ]] && others+=($j)
  done

  etcd_hostname_a="${hosts[${others[0]}]}"
  etcd_address_a="${addrs[${others[0]}]}"
  etcd_hostname_b="${hosts[${others[1]}]}"
  etcd_address_b="${addrs[${others[1]}]}"

  cat > "${instance_hostname}.yaml" << EOF
name: '${instance_hostname}'
data-dir: /var/lib/etcd
listen-peer-urls: 'http://${instance_address}:2380'
listen-client-urls: 'http://${instance_address}:2379,http://127.0.0.1:2379'
initial-advertise-peer-urls: 'http://${instance_address}:2380'
advertise-client-urls: 'http://${instance_address}:2379'

initial-cluster: '${instance_hostname}=http://${instance_address}:2380,${etcd_hostname_a}=http://${etcd_address_a}:2380,${etcd_hostname_b}=http://${etcd_address_b}:2380'
initial-cluster-state: 'new'
initial-cluster-token: 'etcd-cluster'
EOF

  echo "Generated: ${instance_hostname}.yaml"
done
スクリプトを実行して設定ファイルを生成します。
chmod +x generate_etcd_configs.sh
./generate_etcd_configs.sh
生成された設定ファイルを各ノードに配布します。
for i in $(seq 1 3); do
  orb push etcd-${i}.yaml -m etcd-${i} /tmp/
  orb shell -m etcd-${i} sudo mv /tmp/etcd-${i}.yaml /etc/etcd/etcd.yaml
  orb shell -m etcd-${i} sudo chown etcd:etcd /etc/etcd/etcd.yaml
done
全ノードでEtcdサービスを起動します。
for i in $(seq 1 3); do
  orb shell -m etcd-${i} sudo systemctl enable etcd
  orb shell -m etcd-${i} sudo systemctl start etcd
done
各ノードでEtcdサービスが正常に起動していることを確認します。
for i in $(seq 1 3); do
  orb shell -m etcd-${i} sudo systemctl status etcd -n 0
done
● etcd.service - etcd distributed reliable key-value store
     Loaded: loaded (/etc/systemd/system/etcd.service; enabled; preset: disabled)
    Drop-In: /run/systemd/system/service.d
             └─zzz-lxc-service.conf
     Active: active (running) since Thu 2026-02-26 16:37:52 JST; 1min 40s ago
   Main PID: 777 (etcd)
      Tasks: 18 (limit: 617192)
     Memory: 83.9M (peak: 86.0M)
        CPU: 2.247s
     CGroup: /system.slice/etcd.service
             └─777 /opt/vmware/etcd/bin/etcd --config-file /etc/etcd/etcd.yaml
● etcd.service - etcd distributed reliable key-value store
     Loaded: loaded (/etc/systemd/system/etcd.service; enabled; preset: disabled)
    Drop-In: /run/systemd/system/service.d
             └─zzz-lxc-service.conf
     Active: active (running) since Thu 2026-02-26 16:37:52 JST; 1min 40s ago
   Main PID: 430 (etcd)
      Tasks: 19 (limit: 617192)
     Memory: 61.1M (peak: 62.2M)
        CPU: 2.081s
     CGroup: /system.slice/etcd.service
             └─430 /opt/vmware/etcd/bin/etcd --config-file /etc/etcd/etcd.yaml
● etcd.service - etcd distributed reliable key-value store
     Loaded: loaded (/etc/systemd/system/etcd.service; enabled; preset: disabled)
    Drop-In: /run/systemd/system/service.d
             └─zzz-lxc-service.conf
     Active: active (running) since Thu 2026-02-26 16:37:52 JST; 1min 40s ago
   Main PID: 432 (etcd)
      Tasks: 18 (limit: 617192)
     Memory: 64.4M (peak: 65.4M)
        CPU: 2.675s
     CGroup: /system.slice/etcd.service
             └─432 /opt/vmware/etcd/bin/etcd --config-file /etc/etcd/etcd.yaml
Etcdノードの1つにログインして、クラスターの状態を確認します。
orb shell -m etcd-1
etcdctlコマンドでクラスター内の全エンドポイントのヘルスチェックを行います。
/opt/vmware/etcd/bin/etcdctl endpoint health --cluster -w table
+-----------------------------+--------+-------------+-------+
|          ENDPOINT           | HEALTH |    TOOK     | ERROR |
+-----------------------------+--------+-------------+-------+
|  http://192.168.139.78:2379 |   true |  6.363441ms |       |
| http://192.168.139.214:2379 |   true | 26.989624ms |       |
| http://192.168.139.203:2379 |   true | 28.053309ms |       |
+-----------------------------+--------+-------------+-------+
各ノードのステータス(バージョン、DB サイズ、リーダー情報など)を確認します。
/opt/vmware/etcd/bin/etcdctl endpoint status --cluster -w table
+-----------------------------+------------------+---------+-----------------+---------+--------+-----------------------+--------+-----------+------------+-----------+------------+--------------------+--------+--------------------------+-------------------+
|          ENDPOINT           |        ID        | VERSION | STORAGE VERSION | DB SIZE | IN USE | PERCENTAGE NOT IN USE | QUOTA  | IS LEADER | IS LEARNER | RAFT TERM | RAFT INDEX | RAFT APPLIED INDEX | ERRORS | DOWNGRADE TARGET VERSION | DOWNGRADE ENABLED |
+-----------------------------+------------------+---------+-----------------+---------+--------+-----------------------+--------+-----------+------------+-----------+------------+--------------------+--------+--------------------------+-------------------+
| http://192.168.139.203:2379 | 19506a455bdfcf4f |   3.6.7 |           3.6.0 |   20 kB |  16 kB |                   20% | 2.1 GB |     false |      false |         2 |         11 |                 11 |        |                          |             false |
|  http://192.168.139.78:2379 | 9b774fa21f98412c |   3.6.7 |           3.6.0 |   20 kB |  16 kB |                   20% | 2.1 GB |     false |      false |         2 |         11 |                 11 |        |                          |             false |
| http://192.168.139.214:2379 | a4d6bd99f689a01b |   3.6.7 |           3.6.0 |   20 kB |  16 kB |                   20% | 2.1 GB |      true |      false |         2 |         11 |                 11 |        |                          |             false |
+-----------------------------+------------------+---------+-----------------+---------+--------+-----------------------+--------+-----------+------------+-----------+------------+--------------------+--------+--------------------------+-------------------+
3ノード全てがHEALTH: trueであれば、Etcdクラスターは正常に稼働しています。
Postgres / Patroni クラスターの構築
続いて、PostgreSQLとPatroniをインストールしてHA構成のPostgreSQLクラスターを構築します。
まず、1台目のPostgres用のLinux Machineを作成してシェルに入ります。
orb create -a amd64 rocky:9 postgres-1
orb shell -m postgres-1
ドキュメントには書いてありませんでしたが、VMware Tanzu for Postgresのインストールにはlibssh2パッケージが必要でした。
libssh2パッケージをインストールするにはEPEL(Extra Packages for Enterprise Linux)リポジトリを有効化する必要があります。
sudo dnf install epel-release -y
メタデータを更新します。
sudo dnf clean all
sudo dnf makecache
libssh2(その他、あると便利な)パッケージをインストールします。
sudo dnf install libssh2 which lsof vim bind-utils -y
VMware Tanzu for Postgres 18のRPMパッケージをインストールします。
cd /Users/$USER/Downloads/vmware-postgres-18.2.0
sudo dnf install ./vmware-postgres18-18.2-1.el9.x86_64.rpm ./vmware-postgres18-libs-18.2-1.el9.x86_64.rpm -y
PatroniはPythonで実装されているため、Python3とpipをインストールします。
sudo dnf install -y python3 python3-pip
Patroniが必要とするPythonライブラリの一覧をrequirements.txtに記載します。
cat <<EOF > /tmp/requirements.txt
PyYAML
click>=4.1
prettytable>=0.7
psutil>=2.0.0
python-dateutil
python-etcd>=0.4.3,<0.5
requests
six >= 1.7
urllib3>=1.19.1,!=1.21
ydiff>=1.2.0
cdiff>=1.0
EOF
postgresユーザーとしてPythonライブラリをインストールします。
sudo -u postgres pip3 install --user -r /tmp/requirements.txt
PatroniのRPMパッケージをインストールします。
cd /Users/$USER/Downloads/vmware-postgres-18.2.0
sudo dnf install ./vmware-postgres-patroni-4.1.0-4.el9.x86_64.rpm -y
Patroniがクラスターを初期化した直後に実行されるブートストラップスクリプトを作成します。このスクリプトでは、postgresユーザーのパスワード設定、レプリケーション用ユーザー(replicator)の作成、およびpg_rewind用ユーザー(rewind_user)の作成と必要な権限付与を行います。パスワードは適宜変更してください。
sudo -u postgres tee /etc/patroni/post_bootstrap.sh <<'EOF'
#!/bin/bash
/opt/vmware/postgres/18/bin/psql -U postgres <<SQL
ALTER USER postgres WITH PASSWORD 'postgres';
CREATE USER replicator WITH REPLICATION PASSWORD 'rep-pass';
CREATE USER rewind_user WITH PASSWORD 'rewind_password';
GRANT EXECUTE ON FUNCTION pg_catalog.pg_ls_dir(text, boolean, boolean) TO rewind_user;
GRANT EXECUTE ON FUNCTION pg_catalog.pg_stat_file(text, boolean) TO rewind_user;
GRANT EXECUTE ON FUNCTION pg_catalog.pg_read_binary_file(text) TO rewind_user;
GRANT EXECUTE ON FUNCTION pg_catalog.pg_read_binary_file(text, bigint, bigint, boolean) TO rewind_user;
SQL
EOF

sudo chmod +x /etc/patroni/post_bootstrap.sh
Patroniをsystemdサービスとして管理するためのユニットファイルを作成します。
sudo tee /etc/systemd/system/patroni.service <<'EOF'
[Unit]
Description=Patroni - HA solution for PostgreSQL
After=syslog.target network.target etcd.service

[Service]
Type=simple
User=postgres
Group=postgres
ExecStart=/opt/vmware/patroni-python3/bin/patroni /etc/patroni/patroni.yaml
ExecReload=/bin/kill -s HUP $MAINPID
KillMode=process
KillSignal=SIGINT
TimeoutSec=30
Restart=on-failure
RestartSec=30s
LimitNOFILE=65536

[Install]
WantedBy=multi-user.target
EOF
1台目の設定が完了したので、シェルを抜けます。
exit
Etcdと同様に、orb cloneで残り2台のPostgresノードを作成します。
orb clone postgres-1 postgres-2
orb clone postgres-1 postgres-3
クローンしたマシンを起動します。
orb start postgres-2
orb start postgres-3
各ノードのIPアドレスを確認します。このIPアドレスはPatroniおよびHAProxyの設定で使用します。
$ orb list
NAME        STATE    DISTRO      VERSION  ARCH   SIZE  IP
----        -----    ------      -------  ----   ----  --
etcd-1      running  rockylinux  9        amd64        192.168.139.78
etcd-2      running  rockylinux  9        amd64        192.168.139.203
etcd-3      running  rockylinux  9        amd64        192.168.139.214
postgres-1  running  rockylinux  9        amd64        192.168.139.134
postgres-2  running  rockylinux  9        amd64        192.168.139.155
postgres-3  running  rockylinux  9        amd64        192.168.139.141
Etcdの設定ファイルと同様に、generate_patroni_configs.shを作成して各ノードのPatroni設定ファイルを自動生成します。設定ファイルでは、Etcdクラスターのアドレス、PostgreSQLのデータディレクトリ、レプリケーションやpg_rewindの認証情報などを定義します。パスワードはpost_bootstrap.shで設定したものと合わせてください。
hosts=("postgres-1" "postgres-2" "postgres-3")
addrs=("192.168.139.134" "192.168.139.155" "192.168.139.141")
etcd_addrs=("192.168.139.78" "192.168.139.203" "192.168.139.214")
data_host_CIDR="192.168.139.0/24"

etcd_hosts=$(IFS=,; echo "${etcd_addrs[*]/%/:2379}")

for i in "${!hosts[@]}"; do
  instance_name="${hosts[$i]}"
  instance_address="${addrs[$i]}"

  cat > "patroni-${instance_name}.yaml" <<EOF
scope: patroni_cluster
name: $instance_name
restapi:
  listen: '$instance_address:8008'
  connect_address: '$instance_address:8008'
etcd3:
  hosts: '$etcd_hosts'
bootstrap:
  post_bootstrap: /etc/patroni/post_bootstrap.sh
  dcs:
    ttl: 30
    loop_wait: 10
    retry_timeout: 10
    maximum_lag_on_failover: 1048576
    postgresql:
      use_pg_rewind: true
      use_slots: true
      parameters:
        wal_level: replica
        hot_standby: 'on'
        wal_log_hints: 'on'
        wal_keep_size: 320
        max_wal_senders: 8
        max_replication_slots: 8
    slots:
      patroni_standby_leader:
        type: physical
  initdb:
  - encoding: UTF8
  - data-checksums
  pg_hba:
  - host replication replicator $data_host_CIDR md5
  - host all all 0.0.0.0/0 md5
postgresql:
  listen: '$instance_address:5432'
  connect_address: '$instance_address:5432'
  data_dir: /var/lib/pgsql/data
  bin_dir: /opt/vmware/postgres/18/bin
  pgpass: /tmp/pgpass0
  authentication:
    replication:
      username: replicator
      password: rep-pass
    superuser:
      username: postgres
      password: postgres
    rewind:
      username: rewind_user
      password: rewind_password
tags:
  nofailover: false
  noloadbalance: false
  clonefrom: false
  nosync: false
EOF

  echo "Generated: patroni-${instance_name}.yaml"
done
スクリプトを実行して設定ファイルを生成します。
chmod +x generate_patroni_configs.sh
./generate_patroni_configs.sh
生成された設定ファイルを各ノードに配布し、Patroniサービスを有効化します。
for i in $(seq 1 3); do
  orb push patroni-postgres-${i}.yaml -m postgres-${i} /tmp/
  orb shell -m postgres-${i} sudo mv /tmp/patroni-postgres-${i}.yaml /etc/patroni/patroni.yaml
  orb shell -m postgres-${i} sudo chown postgres:postgres /etc/patroni/patroni.yaml
done

for i in $(seq 1 3); do
  orb shell -m postgres-${i} sudo systemctl daemon-reload
  orb shell -m postgres-${i} sudo systemctl enable patroni
done
最初にLeaderとなるノード(postgres-1)でPatroniを起動します。最初のノードが起動するとPostgreSQLのデータベースが初期化され、post_bootstrap.shが実行されます。
orb shell -m postgres-1
sudo systemctl start patroni
残りの2台(postgres-2、postgres-3)は別のターミナルからそれぞれ起動します。これらのノードはLeaderからベースバックアップを取得してReplicaとして参加します。
postgres-2とpostgres-3のPatroniサービスも同様に起動してください。
orb shell -m postgres-2
sudo systemctl start patroni
orb shell -m postgres-3
sudo systemctl start patroni
全ノードのPatroniが起動したら、patronictlコマンドでクラスターの状態を確認します。postgres-1がLeader、postgres-2とpostgres-3がReplicaとしてstreaming状態であれば正常です。
$ patronictl -c /etc/patroni/patroni.yaml list
+ Cluster: patroni_cluster (7611092906447976897) ----+----+-------------+-----+------------+-----+
| Member     | Host            | Role    | State     | TL | Receive LSN | Lag | Replay LSN | Lag |
+------------+-----------------+---------+-----------+----+-------------+-----+------------+-----+
| postgres-1 | 192.168.139.134 | Leader  | running   |  1 |             |     |            |     |
| postgres-2 | 192.168.139.155 | Replica | streaming |  1 |   0/5031A78 |   0 |  0/5031A78 |   0 |
| postgres-3 | 192.168.139.141 | Replica | streaming |  1 |   0/5031A78 |   0 |  0/5031A78 |   0 |
+------------+-----------------+---------+-----------+----+-------------+-----+------------+-----+
PatroniはREST APIを提供しており、各ノードの役割を確認できます。/primaryエンドポイントはLeaderノードで200を返し、それ以外のノードでは503を返します。同様に/replicaエンドポイントはReplicaノードで200を返し、それ以外では503を返します。HAProxyはこのAPIを使ってヘルスチェックを行います。
for ip in 192.168.139.134 192.168.139.155 192.168.139.141;do
  echo "== $ip =="
  echo -n "Primary: "
  curl -s -o /dev/null -w "%{http_code}" http://${ip}:8008/primary
  echo
  echo -n "Replica: "
  curl -s -o /dev/null -w "%{http_code}" http://${ip}:8008/replica
  echo
done
HAProxy の構築
HAProxyをPostgreSQLクラスターの前段に配置し、クライアントからの接続を適切なノードに振り分けます。PatroniのREST APIを利用したヘルスチェックにより、以下のポートで接続を振り分けます。
- ポート5000: Primary(書き込み可能)ノードへの接続
- ポート5001: Replicaノードへの接続(読み取り専用、ラウンドロビン)
- ポート5002: 全ノードへの接続(ラウンドロビン)
HAProxy用のLinux Machineを作成してシェルに入ります。
orb create -a amd64 rocky:9 haproxy
orb shell -m haproxy
VMware Tanzu for Postgresに同梱されているHAProxyのRPMパッケージをインストールします。
cd /Users/$USER/Downloads/vmware-postgres-18.2.0
sudo dnf install ./vmware-postgres-haproxy-3.3.0-2.el9.x86_64.rpm -y
HAProxyの設定ファイルを作成します。各listenセクションでPatroniのREST APIエンドポイントを使ったHTTPヘルスチェックを行い、役割に応じたノードにのみトラフィックを振り分けます。
addrs=("192.168.139.134" "192.168.139.155" "192.168.139.141")

cat << EOF | sudo tee /etc/haproxy/haproxy.cfg > /dev/null
global
    log         /dev/log local0
    log         /dev/log local1 notice
    pidfile     /var/run/haproxy.pid
    maxconn     4000
    user        haproxy
    group       haproxy
    daemon

defaults
    mode                    tcp
    log                     global
    option                  tcplog
    option                  dontlognull
    option                  tcp-check
    retries                 3
    timeout connect         5s
    timeout client          30m
    timeout server          30m
    timeout check           5s
    maxconn                 3000

listen stats
    bind *:7000
    mode http
    stats enable
    stats uri /
    stats refresh 10s
    stats show-node
    stats auth admin:admin

listen primary
    bind *:5000
    option httpchk GET /primary
    http-check expect status 200
    default-server inter 3s fall 3 rise 2 on-marked-down shutdown-sessions
$(for i in "${!addrs[@]}"; do echo "    server postgres-$((i+1)) ${addrs[$i]}:5432 check port 8008"; done)

listen replicas
    bind *:5001
    option httpchk GET /replica
    http-check expect status 200
    default-server inter 3s fall 3 rise 2 on-marked-down shutdown-sessions
$(for i in "${!addrs[@]}"; do echo "    server postgres-$((i+1)) ${addrs[$i]}:5432 check port 8008"; done)

listen all_nodes
    bind *:5002
    balance roundrobin
    option httpchk GET /health
    http-check expect status 200
    default-server inter 3s fall 3 rise 2 on-marked-down shutdown-sessions
$(for i in "${!addrs[@]}"; do echo "    server postgres-$((i+1)) ${addrs[$i]}:5432 check port 8008"; done)
EOF

/opt/vmware/haproxy/sbin/haproxy -c -f /etc/haproxy/haproxy.cfg && echo "Config OK"
HAProxyサービスを有効化して起動します。
sudo systemctl enable haproxy
sudo systemctl start haproxy
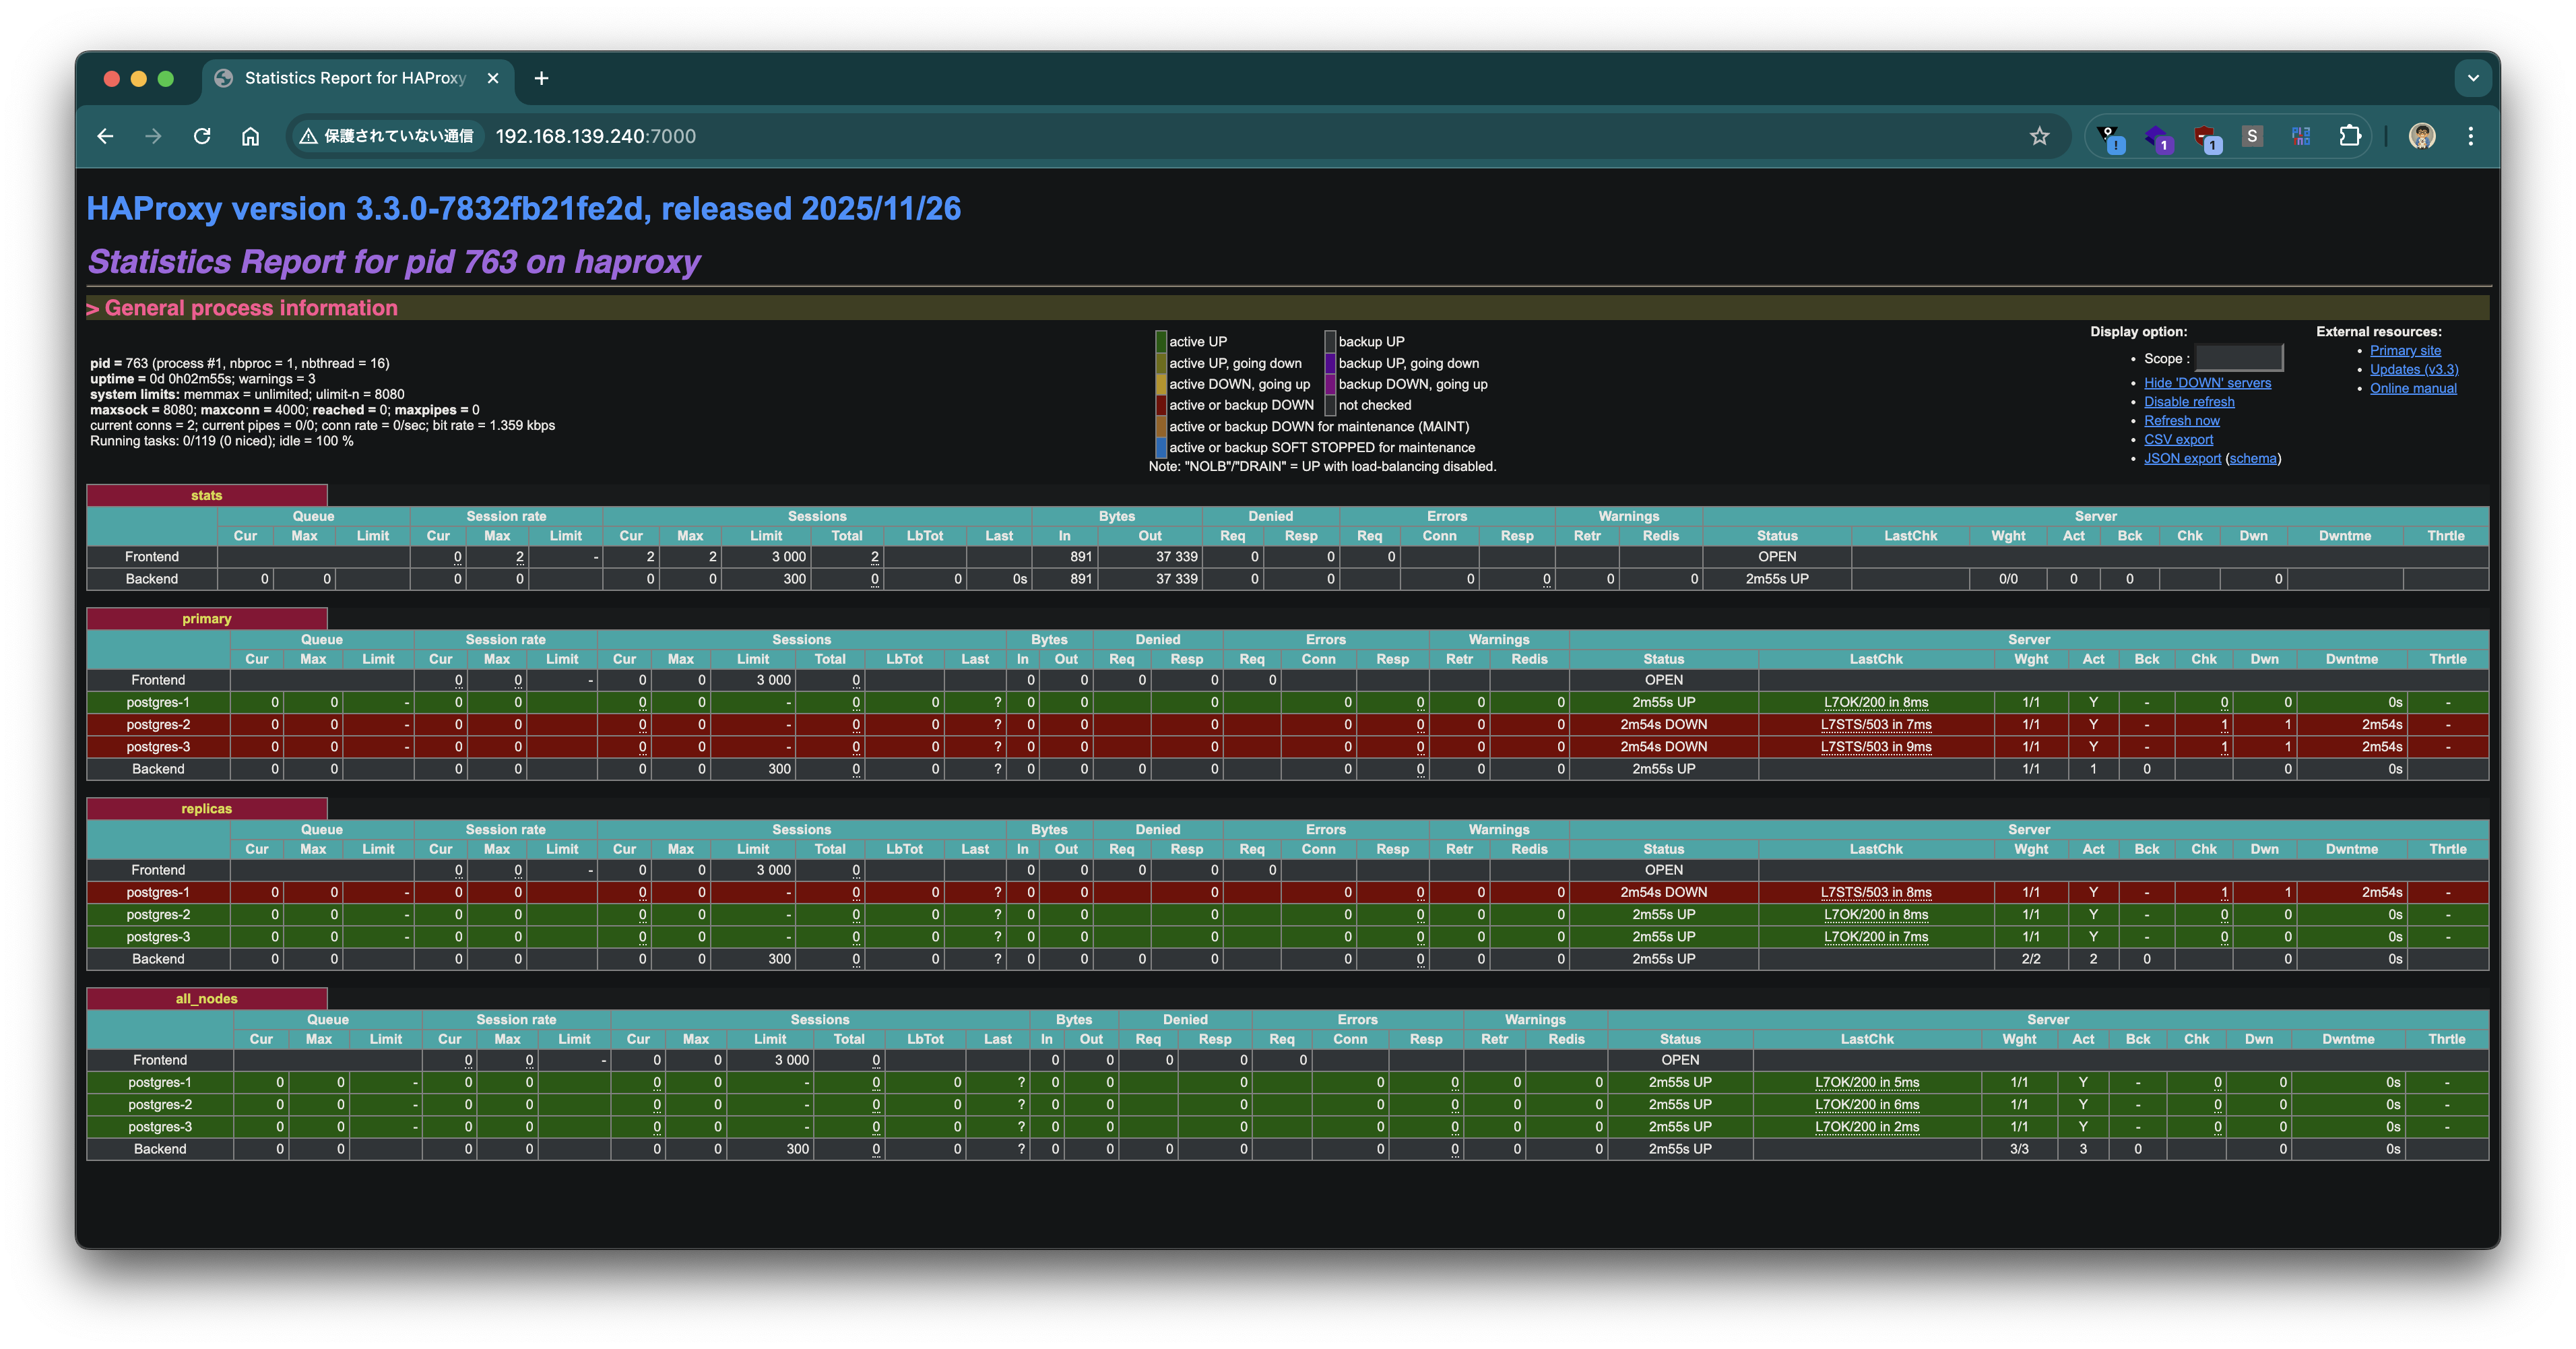
ログを確認すると、HAProxyがPatroniのREST APIを使ってヘルスチェックを行い、各ノードの役割に応じて振り分けが正しく機能していることがわかります。Replicaノードはprimaryポートで503を返すためDOWNとなり、LeaderノードはreplicaポートでDOWNとなることが正常な動作です。
journalctl -u haproxy -f
Feb 26 19:20:55 haproxy haproxy[763]: Server primary/postgres-2 is DOWN, reason: Layer7 wrong status, code: 503, info: "Service Unavailable", check duration: 22ms. 2 active and 0 backup servers left. 0 sessions active, 0 requeued, 0 remaining in queue.
Feb 26 19:20:55 haproxy haproxy[763]: Server primary/postgres-2 is DOWN, reason: Layer7 wrong status, code: 503, info: "Service Unavailable", check duration: 22ms. 2 active and 0 backup servers left. 0 sessions active, 0 requeued, 0 remaining in queue.
Feb 26 19:20:56 haproxy haproxy[763]: Server primary/postgres-3 is DOWN, reason: Layer7 wrong status, code: 503, info: "Service Unavailable", check duration: 21ms. 1 active and 0 backup servers left. 0 sessions active, 0 requeued, 0 remaining in queue.
Feb 26 19:20:56 haproxy haproxy[763]: Server primary/postgres-3 is DOWN, reason: Layer7 wrong status, code: 503, info: "Service Unavailable", check duration: 21ms. 1 active and 0 backup servers left. 0 sessions active, 0 requeued, 0 remaining in queue.
Feb 26 19:20:56 haproxy haproxy[763]: Server replicas/postgres-1 is DOWN, reason: Layer7 wrong status, code: 503, info: "Service Unavailable", check duration: 6ms. 2 active and 0 backup servers left. 0 sessions active, 0 requeued, 0 remaining in queue.
Feb 26 19:20:56 haproxy haproxy[763]: Server replicas/postgres-1 is DOWN, reason: Layer7 wrong status, code: 503, info: "Service Unavailable", check duration: 6ms. 2 active and 0 backup servers left. 0 sessions active, 0 requeued, 0 remaining in queue.
全マシンの一覧を確認します。HAProxyのIPアドレス(192.168.139.240)がクライアントからの接続先となります。
$ orb list
NAME        STATE    DISTRO      VERSION  ARCH   SIZE  IP
----        -----    ------      -------  ----   ----  --
etcd-1      running  rockylinux  9        amd64        192.168.139.78
etcd-2      running  rockylinux  9        amd64        192.168.139.203
etcd-3      running  rockylinux  9        amd64        192.168.139.214
haproxy     running  rockylinux  9        amd64        192.168.139.240
postgres-1  running  rockylinux  9        amd64        192.168.139.134
postgres-2  running  rockylinux  9        amd64        192.168.139.155
postgres-3  running  rockylinux  9        amd64        192.168.139.141
HAProxyの統計画面(ポート7000)にブラウザからアクセスすると、各バックエンドの状態を視覚的に確認できます。
HAProxy経由でPostgreSQLに接続して動作を確認します。
ポート5000(primary)に接続すると、Leaderノード(192.168.139.134)に接続され、pg_is_in_recovery()がf(false)を返します。
$ psql postgresql://postgres:postgres@192.168.139.240:5000 -c "SELECT inet_server_addr(), pg_is_in_recovery()"
 inet_server_addr | pg_is_in_recovery
------------------+-------------------
 192.168.139.134  | f
(1 row)
ポート5001(replica)に接続すると、Replicaノードにラウンドロビンで接続されます。pg_is_in_recovery()がt(true)を返し、読み取り専用であることがわかります。
$ psql postgresql://postgres:postgres@192.168.139.240:5001 -c "SELECT inet_server_addr(), pg_is_in_recovery()"
 inet_server_addr | pg_is_in_recovery
------------------+-------------------
 192.168.139.155  | t
(1 row)

$ psql postgresql://postgres:postgres@192.168.139.240:5001 -c "SELECT inet_server_addr(), pg_is_in_recovery()"
 inet_server_addr | pg_is_in_recovery
------------------+-------------------
 192.168.139.141  | t
(1 row)
ポート5002(all_nodes)に接続すると、Leader・Replica問わず全ノードにラウンドロビンで接続されます。
$ psql postgresql://postgres:postgres@192.168.139.240:5002 -c "SELECT inet_server_addr(), pg_is_in_recovery()"
 inet_server_addr | pg_is_in_recovery
------------------+-------------------
 192.168.139.134  | f
(1 row)

$ psql postgresql://postgres:postgres@192.168.139.240:5002 -c "SELECT inet_server_addr(), pg_is_in_recovery()"
 inet_server_addr | pg_is_in_recovery
------------------+-------------------
 192.168.139.155  | t
(1 row)

$ psql postgresql://postgres:postgres@192.168.139.240:5002 -c "SELECT inet_server_addr(), pg_is_in_recovery()"
 inet_server_addr | pg_is_in_recovery
------------------+-------------------
 192.168.139.141  | t
レプリケーションが正しく動作していることを確認するため、Primaryにテーブルを作成してデータを挿入します。
psql postgresql://postgres:postgres@192.168.139.240:5000 -c "
CREATE TABLE IF NOT EXISTS organization
(
    organization_id   BIGINT PRIMARY KEY,
    organization_name VARCHAR(255) NOT NULL
);
INSERT INTO organization(organization_id, organization_name) VALUES(1, 'foo');
INSERT INTO organization(organization_id, organization_name) VALUES(2, 'bar');
"
CREATE TABLE
INSERT 0 1
INSERT 0 1
Replicaポート(5001)経由で書き込みを試みると、読み取り専用トランザクションのため正しくエラーになります。
psql postgresql://postgres:postgres@192.168.139.240:5001 -c "INSERT INTO organization(organization_id, organization_name) VALUES(3, 'baz')"
ERROR: cannot execute INSERT in a read-only transaction
all_nodesポート(5002)経由でSELECTを実行すると、全ノードにラウンドロビンで接続され、どのノードからもレプリケーションされたデータが読み取れることを確認できます。
$ psql postgresql://postgres:postgres@192.168.139.240:5002 -c "SELECT inet_server_addr(), organization_id,organization_name from organization"
 inet_server_addr | organization_id | organization_name
------------------+-----------------+-------------------
 192.168.139.134  |               1 | foo
 192.168.139.134  |               2 | bar
(2 rows)

$ psql postgresql://postgres:postgres@192.168.139.240:5002 -c "SELECT inet_server_addr(), organization_id,organization_name from organization"
 inet_server_addr | organization_id | organization_name
------------------+-----------------+-------------------
 192.168.139.155  |               1 | foo
 192.168.139.155  |               2 | bar
(2 rows)

$ psql postgresql://postgres:postgres@192.168.139.240:5002 -c "SELECT inet_server_addr(), organization_id,organization_name from organization"
 inet_server_addr | organization_id | organization_name
------------------+-----------------+-------------------
 192.168.139.141  |               1 | foo
 192.168.139.141  |               2 | bar
(2 rows)
フェイルオーバーのテスト
Patroniのswitchoverコマンドを使って、手動でLeaderを切り替えてフェイルオーバーの動作を確認します。
orb shell -m postgres-1
patronictl switchoverを実行し、Leaderをpostgres-1からpostgres-2に切り替えます。
patronictl -c /etc/patroni/patroni.yaml switchover patroni_cluster
対話的にPrimaryとCandidateを選択して実行します。
Current cluster topology
+ Cluster: patroni_cluster (7611092906447976897) ----+----+-------------+-----+------------+-----+
| Member     | Host            | Role    | State     | TL | Receive LSN | Lag | Replay LSN | Lag |
+------------+-----------------+---------+-----------+----+-------------+-----+------------+-----+
| postgres-1 | 192.168.139.134 | Leader  | running   |  1 |             |     |            |     |
| postgres-2 | 192.168.139.155 | Replica | streaming |  1 |   0/5053F10 |   0 |  0/5053F10 |   0 |
| postgres-3 | 192.168.139.141 | Replica | streaming |  1 |   0/5053F10 |   0 |  0/5053F10 |   0 |
+------------+-----------------+---------+-----------+----+-------------+-----+------------+-----+
Primary [postgres-1]: postgres-1
Candidate ['postgres-2', 'postgres-3'] []: postgres-2
When should the switchover take place (e.g. 2026-02-26T21:09 )  [now]: now
Are you sure you want to switchover cluster patroni_cluster, demoting current leader postgres-1? [y/N]: y
2026-02-26 20:09:59.02874 Successfully switched over to "postgres-2"
+ Cluster: patroni_cluster (7611092906447976897) --+----+-------------+-----+------------+-----+
| Member     | Host            | Role    | State   | TL | Receive LSN | Lag | Replay LSN | Lag |
+------------+-----------------+---------+---------+----+-------------+-----+------------+-----+
| postgres-1 | 192.168.139.134 | Replica | stopped |    |     unknown |     |    unknown |     |
| postgres-2 | 192.168.139.155 | Leader  | running |  1 |             |     |            |     |
| postgres-3 | 192.168.139.141 | Replica | running |  1 |   0/5054070 |   0 |  0/5054070 |   0 |
+------------+-----------------+---------+---------+----+-------------+-----+------------+-----+
しばらく待ってからクラスターの状態を確認すると、postgres-2がLeaderに昇格し、postgres-1がReplicaに降格していることがわかります。Timeline(TL)も2に進んでいます。
$ patronictl -c /etc/patroni/patroni.yaml list
+ Cluster: patroni_cluster (7611092906447976897) ----+----+-------------+-----+------------+-----+
| Member     | Host            | Role    | State     | TL | Receive LSN | Lag | Replay LSN | Lag |
+------------+-----------------+---------+-----------+----+-------------+-----+------------+-----+
| postgres-1 | 192.168.139.134 | Replica | streaming |  2 |   0/50541B0 |   0 |  0/50541B0 |   0 |
| postgres-2 | 192.168.139.155 | Leader  | running   |  2 |             |     |            |     |
| postgres-3 | 192.168.139.141 | Replica | streaming |  2 |   0/50541B0 |   0 |  0/50541B0 |   0 |
+------------+-----------------+---------+-----------+----+-------------+-----+------------+-----+
HAProxyの統計画面でも、postgres-2がprimaryバックエンドでUP、postgres-1がreplicasバックエンドでUPに変わっていることが確認できます。

HAProxy経由の接続もswitchoverに追従しています。ポート5000(primary)では新しいLeaderであるpostgres-2(192.168.139.155)に接続され、ポート5001(replica)ではpostgres-1とpostgres-3に接続されるようになりました。
$ psql postgresql://postgres:postgres@192.168.139.240:5000 -c "SELECT inet_server_addr(), pg_is_in_recovery()"
 inet_server_addr | pg_is_in_recovery
------------------+-------------------
 192.168.139.155  | f
(1 row)

$ psql postgresql://postgres:postgres@192.168.139.240:5001 -c "SELECT inet_server_addr(), pg_is_in_recovery()"
 inet_server_addr | pg_is_in_recovery
------------------+-------------------
 192.168.139.141  | t
(1 row)

$ psql postgresql://postgres:postgres@192.168.139.240:5001 -c "SELECT inet_server_addr(), pg_is_in_recovery()"
 inet_server_addr | pg_is_in_recovery
------------------+-------------------
 192.168.139.134  | t
(1 row)
OrbStackのLinux Machineを使って、VMware Tanzu for Postgres 18.2をPatroniによるHA構成でRocky Linux 9上に構築しました。
patronictl switchoverによるフェイルオーバーでは、Leaderの切り替え後にHAProxyが自動的に新しいLeaderを検出し、クライアントからの接続先が透過的に切り替わることを確認しました。